for Android phones and tablets
Let’s say we want to record an audio track. First of all, what we need to do is tap the add a blank track icon ![]() , then choose “add an audio track” to add a new, blank audio track.
, then choose “add an audio track” to add a new, blank audio track.
Before starting to record, we need to check the audio track is “armed”. This means it has an input channel assigned and is enabled for recording.
To arm a track, tap on the arm icon  . Here you can choose the input channel from which n-Track should record sound.
If the project is blank, you can automatically start recording by pressing the record button on the transport bar. This action adds a blank armed audio track and starts recording from your built-in microphone.
At this point, simply pick up your instrument and push the record button  to start recording your first audio track.
To stop the recording, simply tap the record button again.
Now tap the rewind button  or move the yellow timeline cursor to the position you want to start playback and push the play button
  to listen your creation.
If you want to focus on a section, and listen to a single part of your take repeatedly, then you need to use the Loop timeline selection. To use it, you need to highlight an area by drawing with your fingers on the timeline axis, activate the loop function and tap the play button. n-Track will now restart playback from the beginning of our selection as soon as the cursor reaches its end.
If when you record an audio track you notice that the recording level is too low, you can try adjusting the mic input level. You can notice that the recording level is low by looking at the recorded track's level meter, or by looking at the recorded waveform. The more the waveform resembles a flat line the lower the recording level. Unfortunately Android doesn't currently allow setting the mic recording volume. There are a few recording presets available that depending on the device may change the mic recording level (while also possibly changing other processing options on the mic signal such as equalization and limiting). Try switching between the available options for the Mic/input level preset setting in the Settings box.
On Android when you overdub tracks n-Track needs to perform what is called latency compensation. This is needed because of the way the audio flows through the Android operating system. Audio buffering (i.e. the length of the blocks of audio data that are passed between the app and the hardware audio device) is not totally under the control of the app that is doing the recording, so the app doesn't know exactly how to align the recording relative to the existing tracks.
To overcome this issue n-Track includes a latency calibration mechanism. The app will prompt you to calibrate the latency when you first try to record.
You can always repeat the latency calibration by selecting the latency calibration button in the Settings box.
When you perform the latency calibration make sure you are in a quiet room, you disconnect any headphones and external USB audio devices or adapters, and that you turn the volume of the device all the way up. The app will emit a short burst of sound while recording the mic input, and will then try to align the original with the recorded burst.
Let’s say we want to record something over the first track. All we need is to add a new blank audio track and arm it, then we can start recording.
So, again, tap the Add a blank track icon ![]() and choose "Add an audio track”.
and choose "Add an audio track”.
If the track is not armed, tap over the arm button and select the right input channel.
Since you want to record a second track over the first audio track, you need to be able to hear the first and the second track together during recording, but you want only the second track to be recorded, so make sure the first track is unarmed.
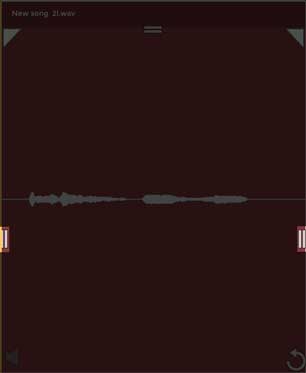
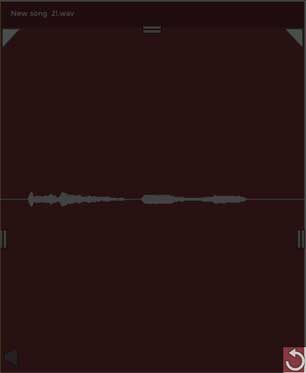
To listen to what you’re recording as you play it, you can tap the Monitor live input button  , which will let you listen to the incoming signal through the selected output destination. Make sure you plug in your headphones and then push the “Monitor live input” button to start listening to the incoming signal. You can now record as you hear what your mike is capturing.
Let’s say you want to upload a base track, backing track or instrumental, and then record your voice or instrument over it.
All you need to do is tap the Menu icon  and select “Import audio file”, then select the file you want to import into n-Track.
n-Track will create a new audio track with the imported audio file, so we can now record over it. To record something over the imported track, just add and arm a second audio track, then start recording.
n-Track can import audio files with one of the following formats:
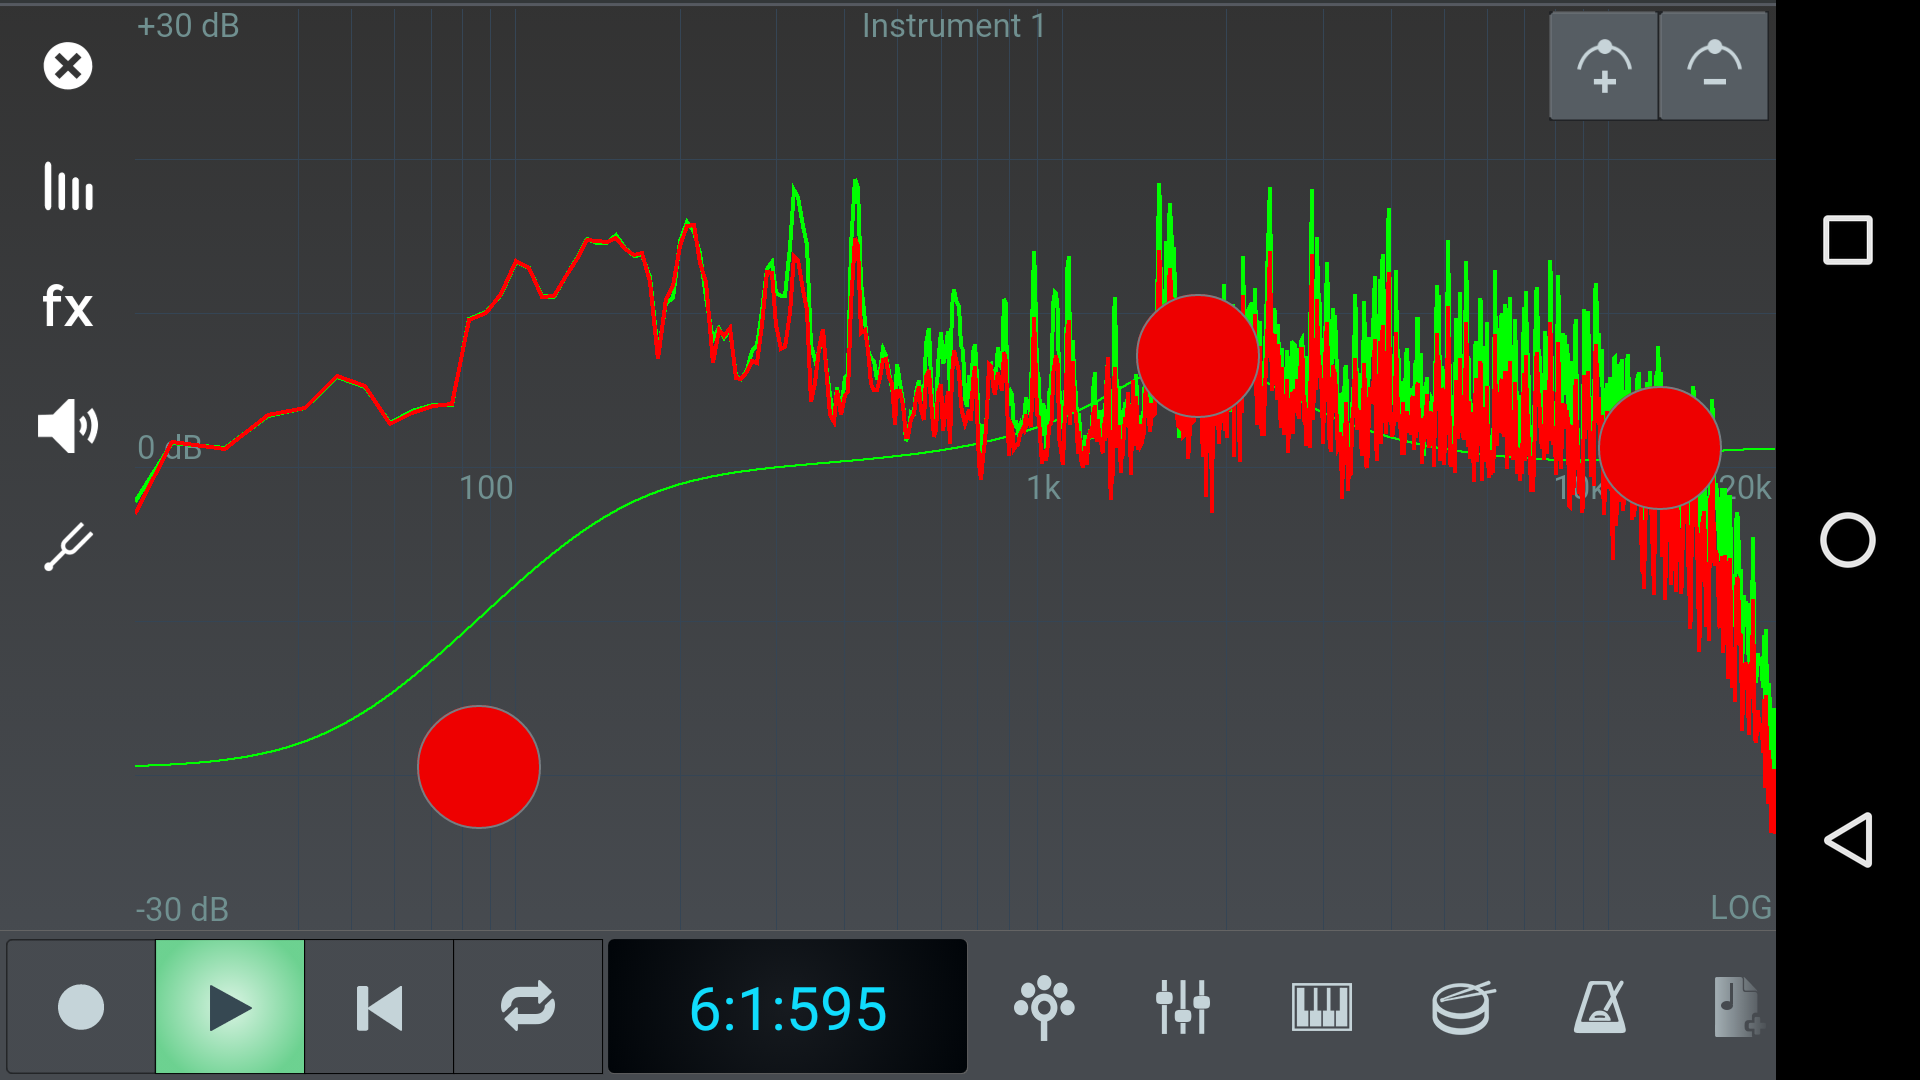
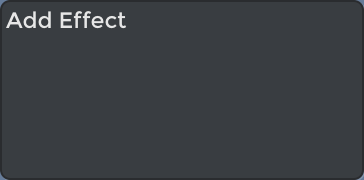
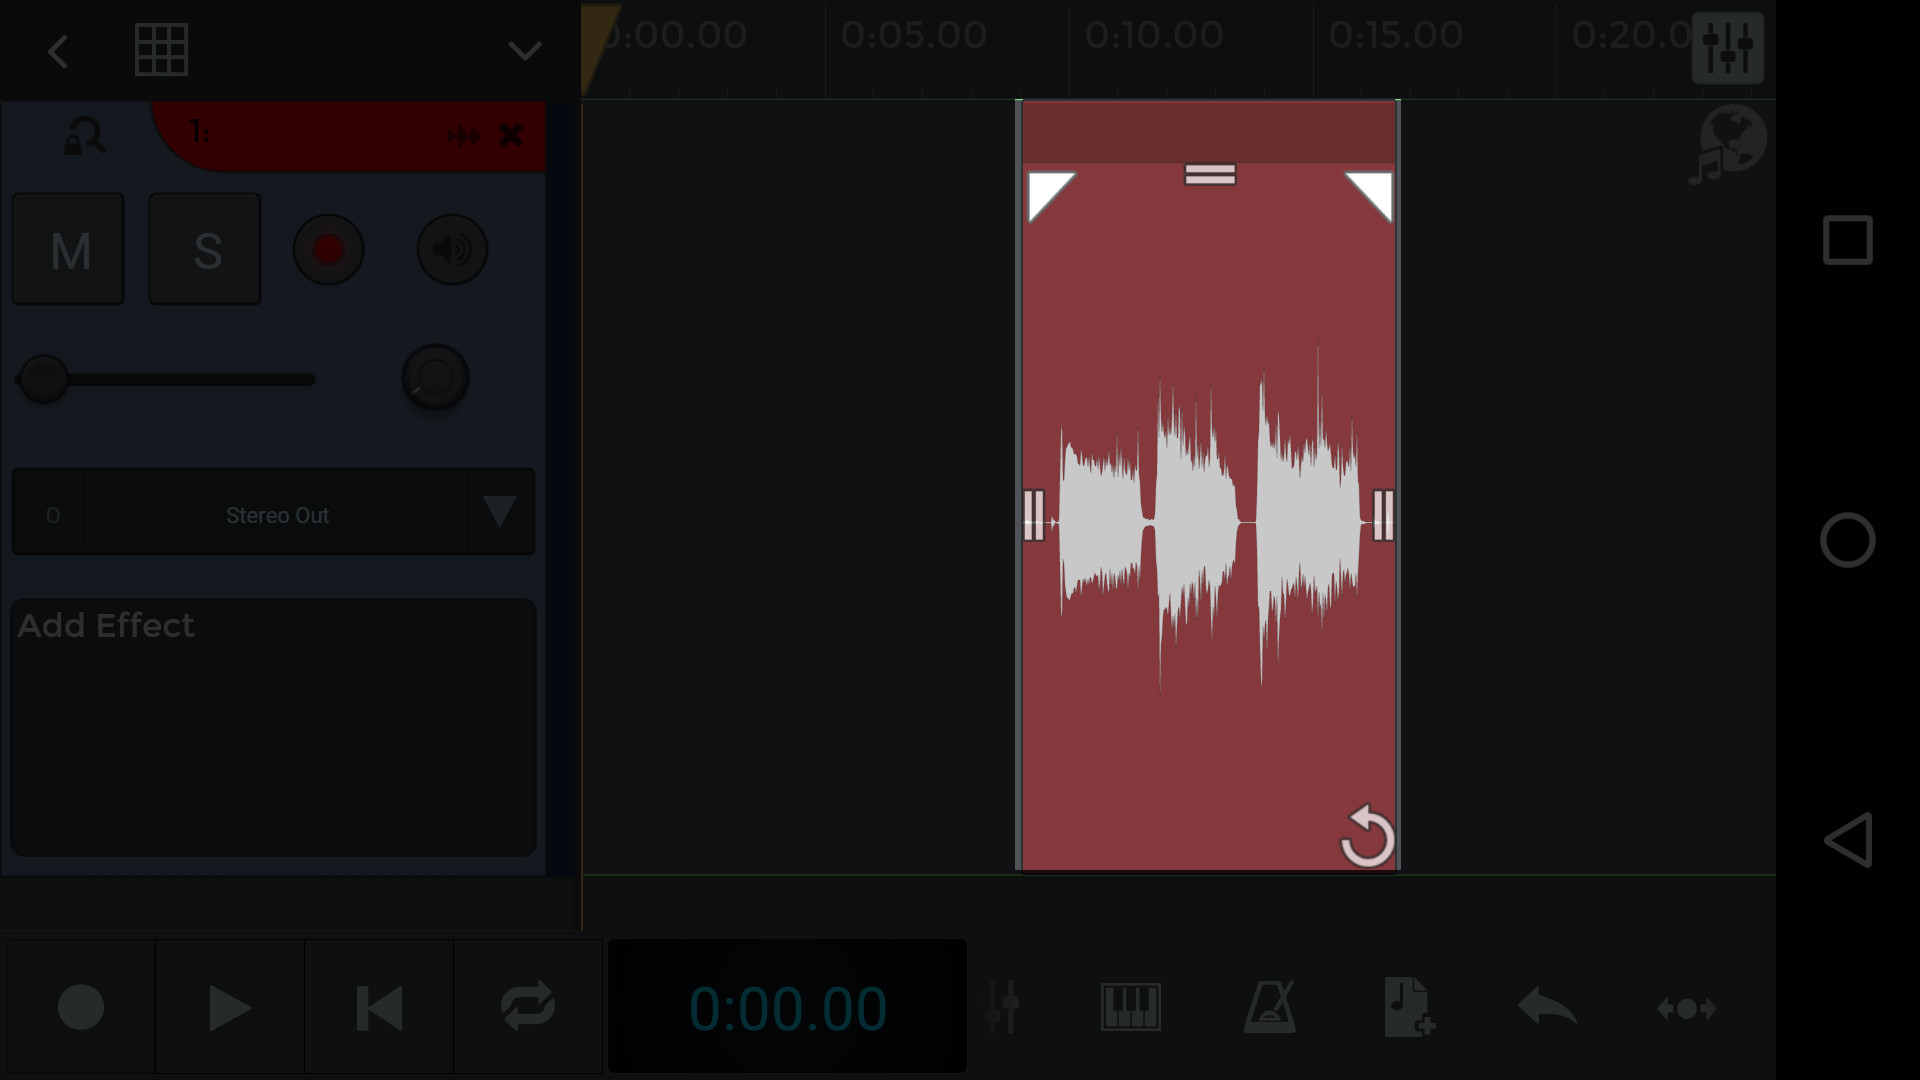
If we’re satisfied with our performance, but we want enhance or get creative with the sound, we can add an effect.
Let’s say we want to add a reverb to a vocal recording. Just use your fingers to zoom into the time-axis view, until you see the add effect panel.
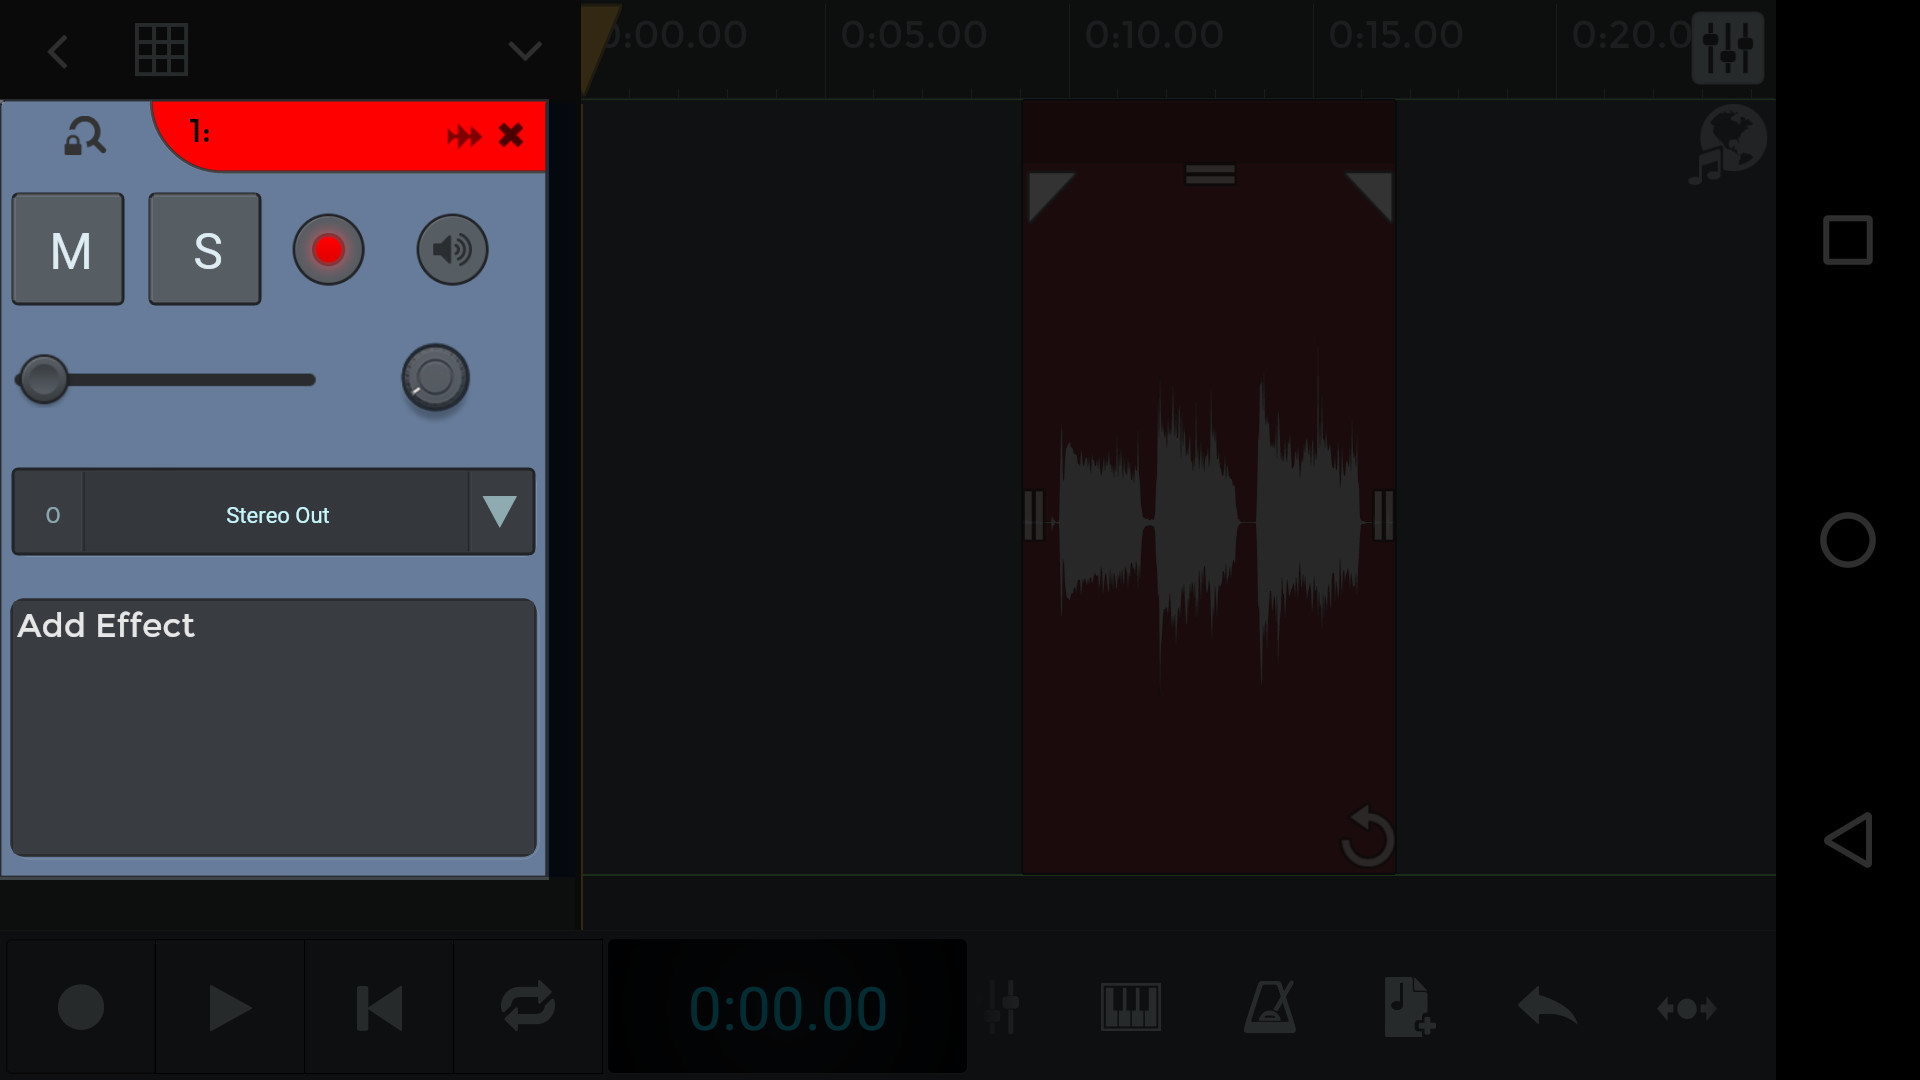
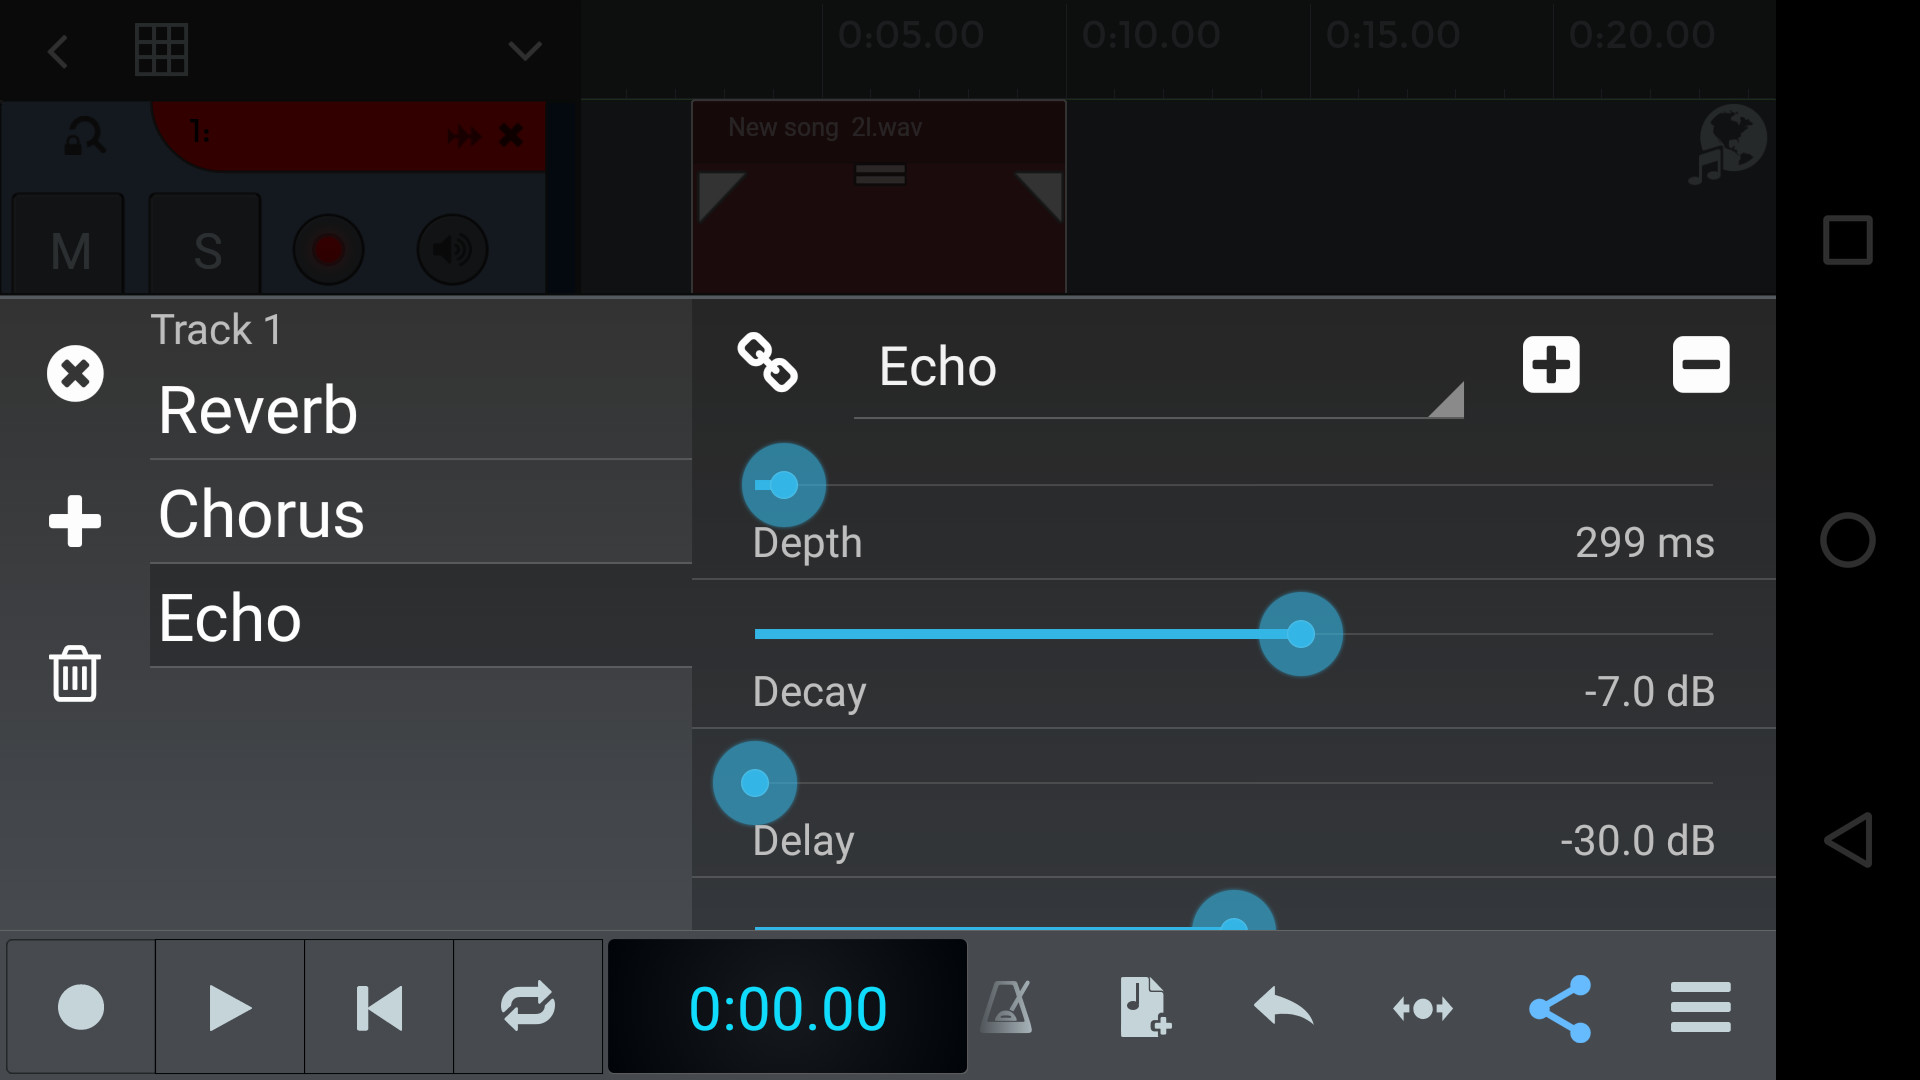
Click on “add effect” and choose among the free integrated effects available in n-Track Studio.
It’s a common use to record songs by following a click track or metronome, and then use the grid to align our recordings to the song’s tempo.
You can select the bpm of your song by tapping the Metronome icon ![]() and selecting the bpm you need.
and selecting the bpm you need.
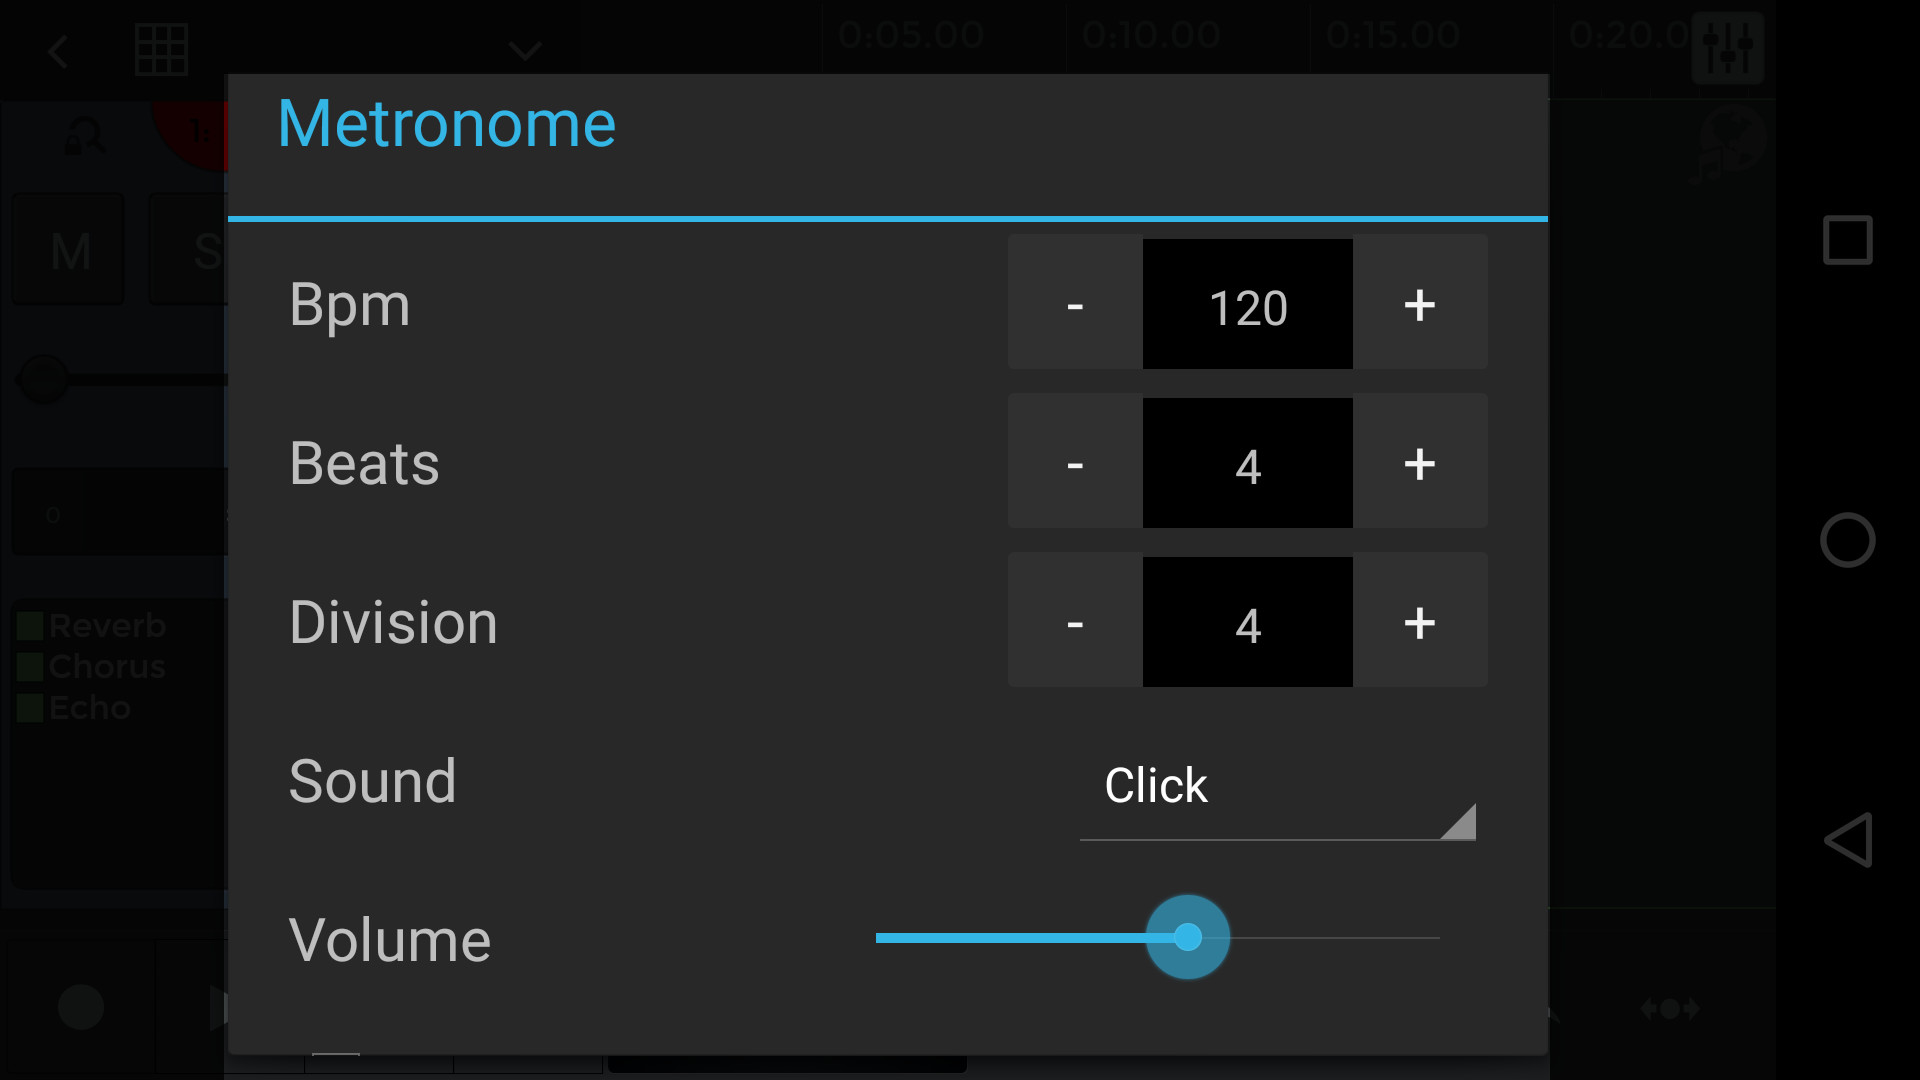
To activate the metronome, switch it on with by tapping "enable". You’ll now hear the metronome both during playback and recording.
To turn it off, just open the metronome and switch it back off.
The grid function can be useful during editing, and in general when you need a reliable tempo reference while working on your song. You can enable the grid by tapping on the “grid icon” ![]() .
.
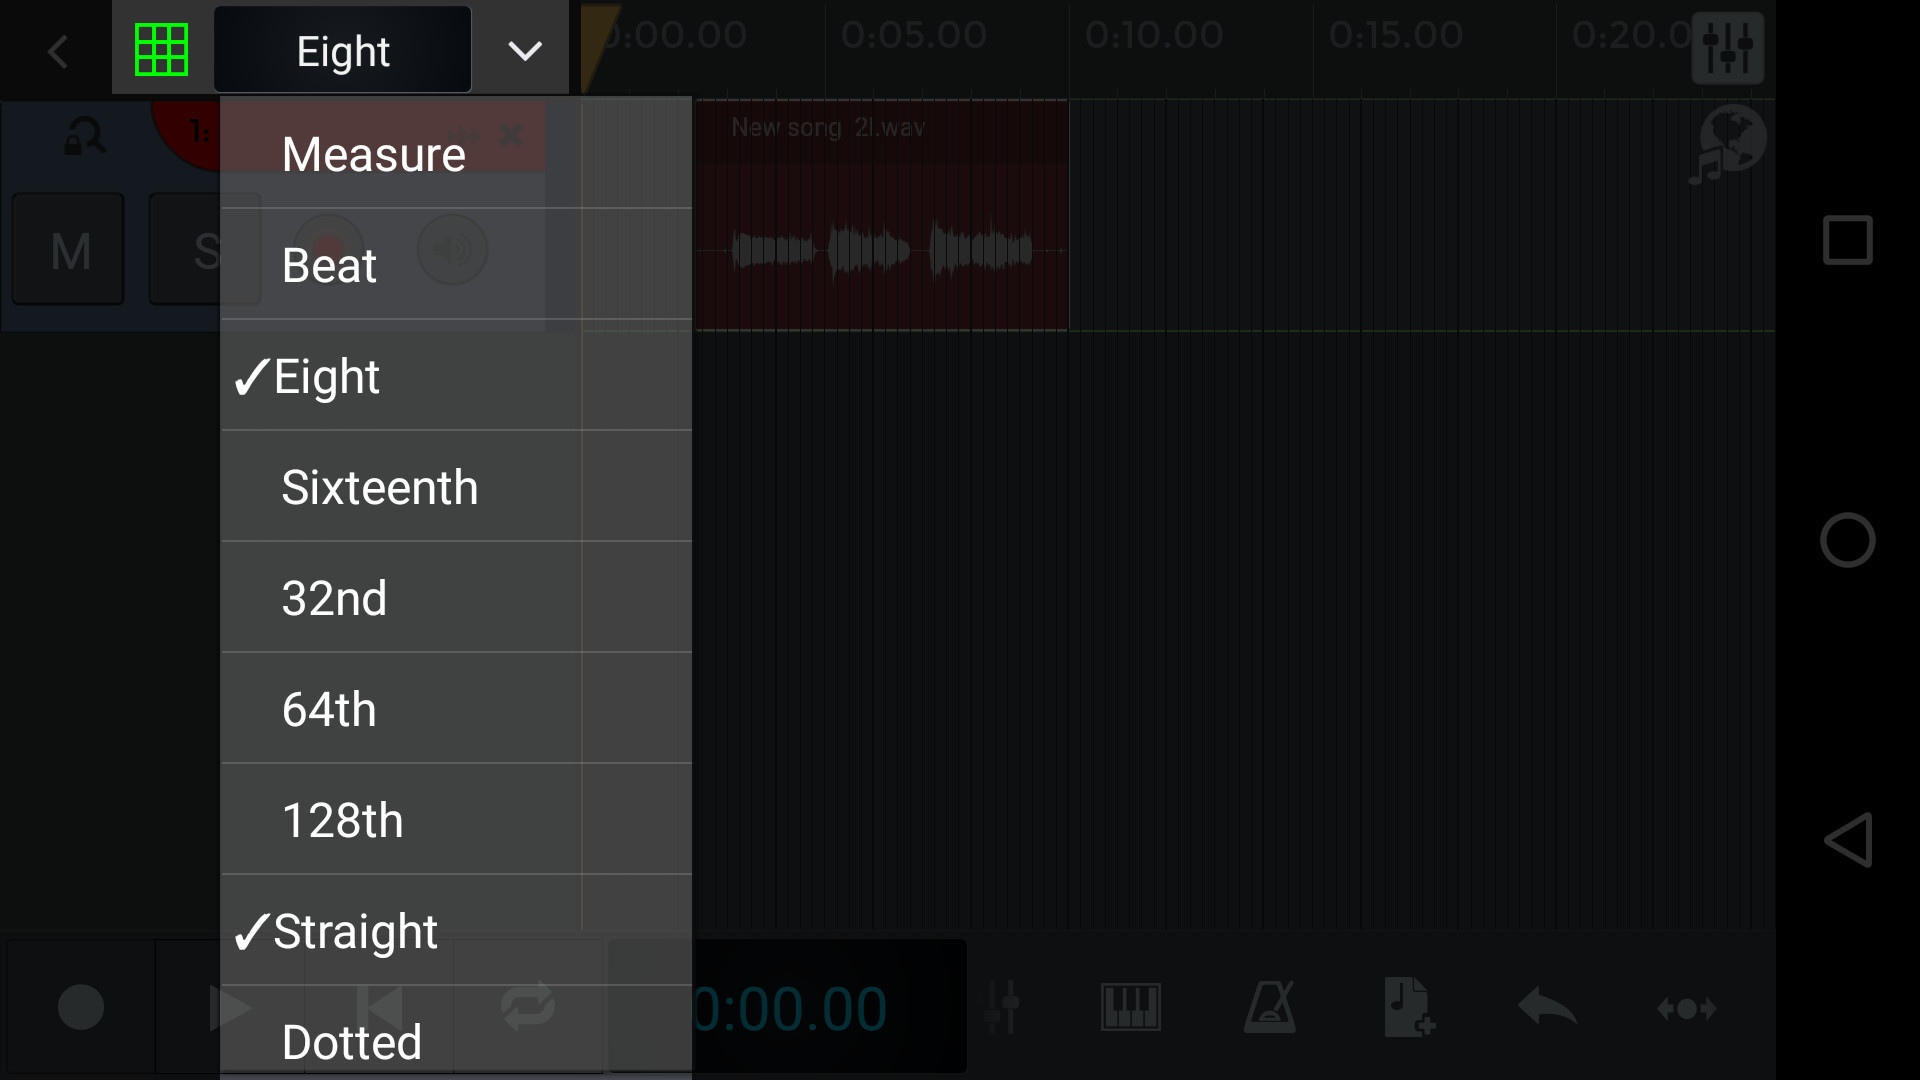
You can set the grid time resolution by tapping the grid settings window (see the picture below).
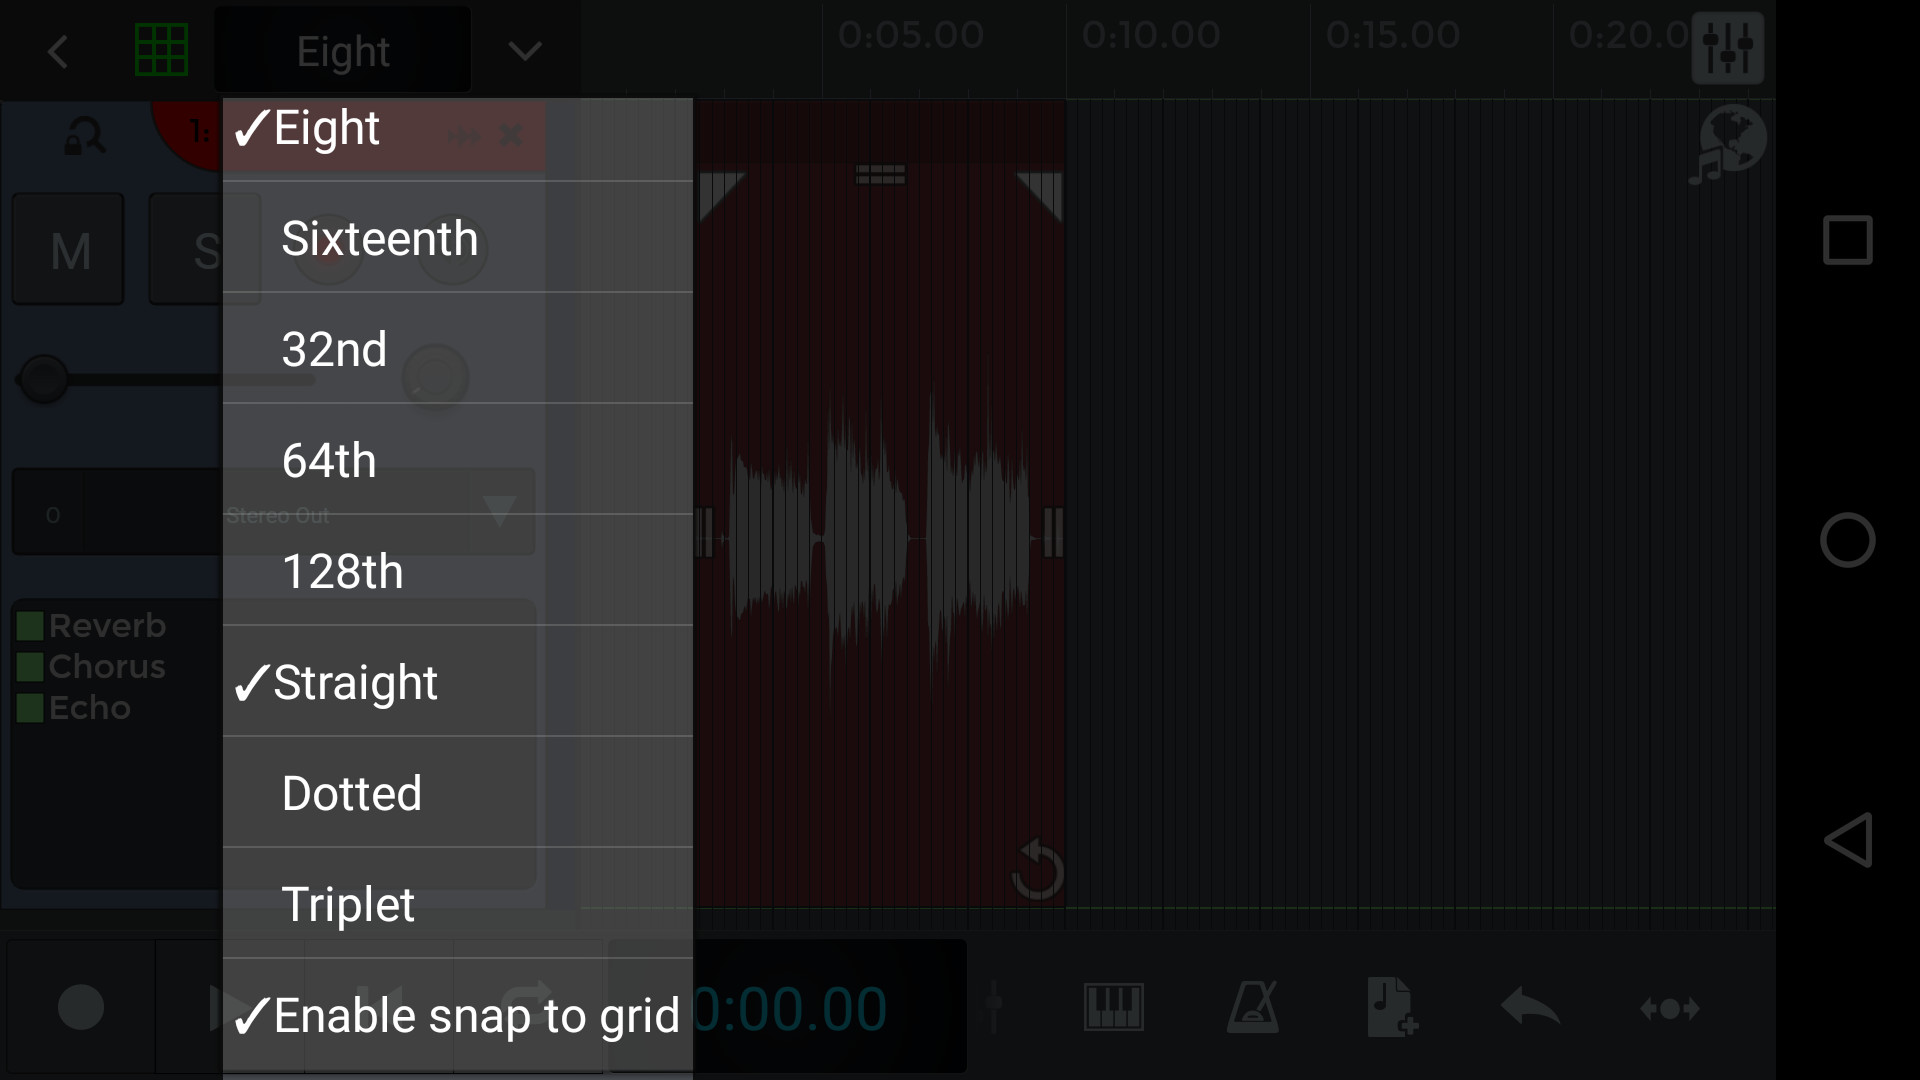
As you can see there’s also a "Enable snap to grid" checkbox. If this is enabled, when we move audio and MIDI regions their start position will be quantized to the closest grid value.
This can be useful if we’re creating more electronic or loop based music. If you uncheck this box, but leave the grid on, then you’ll be free to move regions in any point of the timeline, and still use the grid as a useful tempo reference.
To add a new virtual instrument, just push the “Add a blank track” button ![]() and select “Add an instrument”. This will create a MIDI track and an Instrument track automatically assigned to the MIDI track created.
and select “Add an instrument”. This will create a MIDI track and an Instrument track automatically assigned to the MIDI track created.
MIDI tracks will contain the sequence of MIDI notes, as well as other MIDI parameters, such as velocity. Instrument channels, instead, are where the actual audio from the MIDI notes is generated. Multiple MIDI tracks can send their output to a single instrument channel.
The creation of a MIDI track will open up the instrument browser, that lets you choose the virtual instrument you want to control via MIDI.
To change the MIDI track instrument, simply tap the track’s output slot.
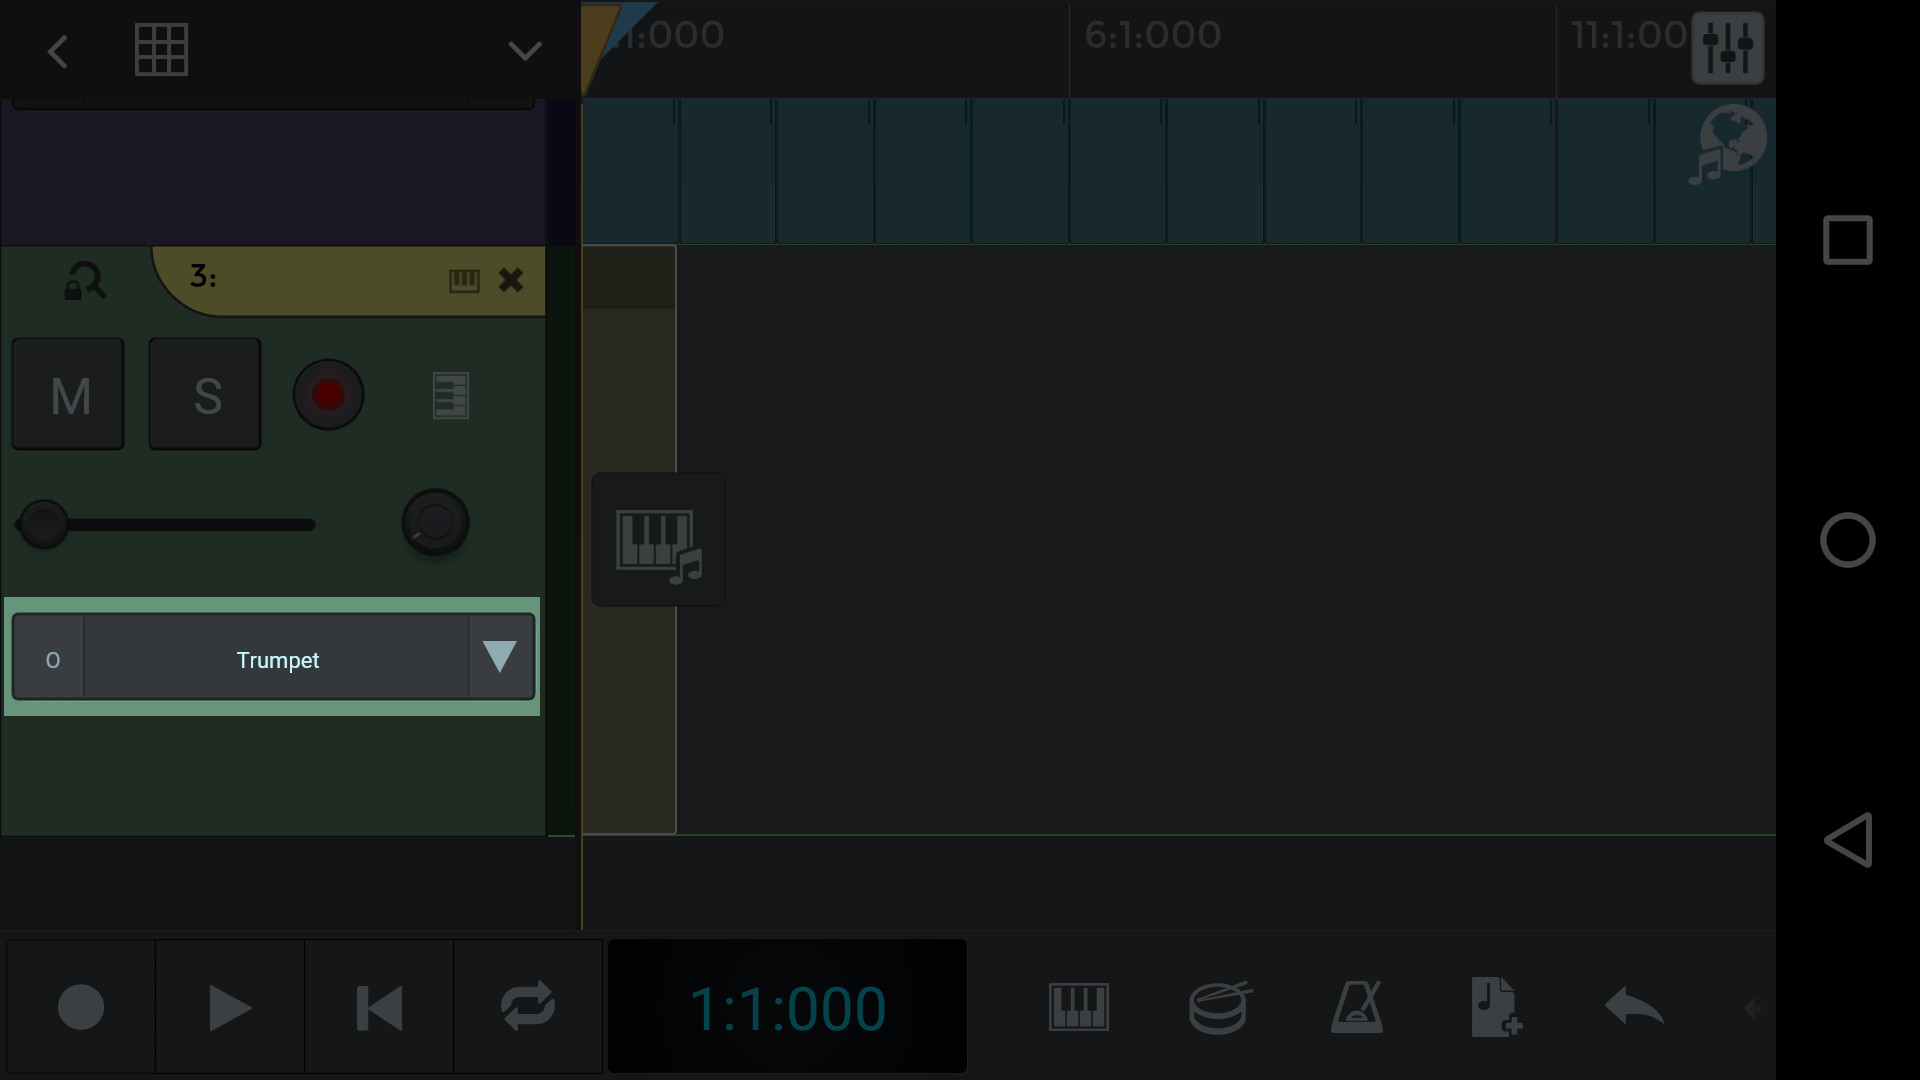
To immediately control our virtual instrument, tap the keyboard icon  and start playing it with your fingers, or open the piano roll by tapping the
 ![]() icon. and start writing midi notes via the piano roll's tools.
icon. and start writing midi notes via the piano roll's tools.
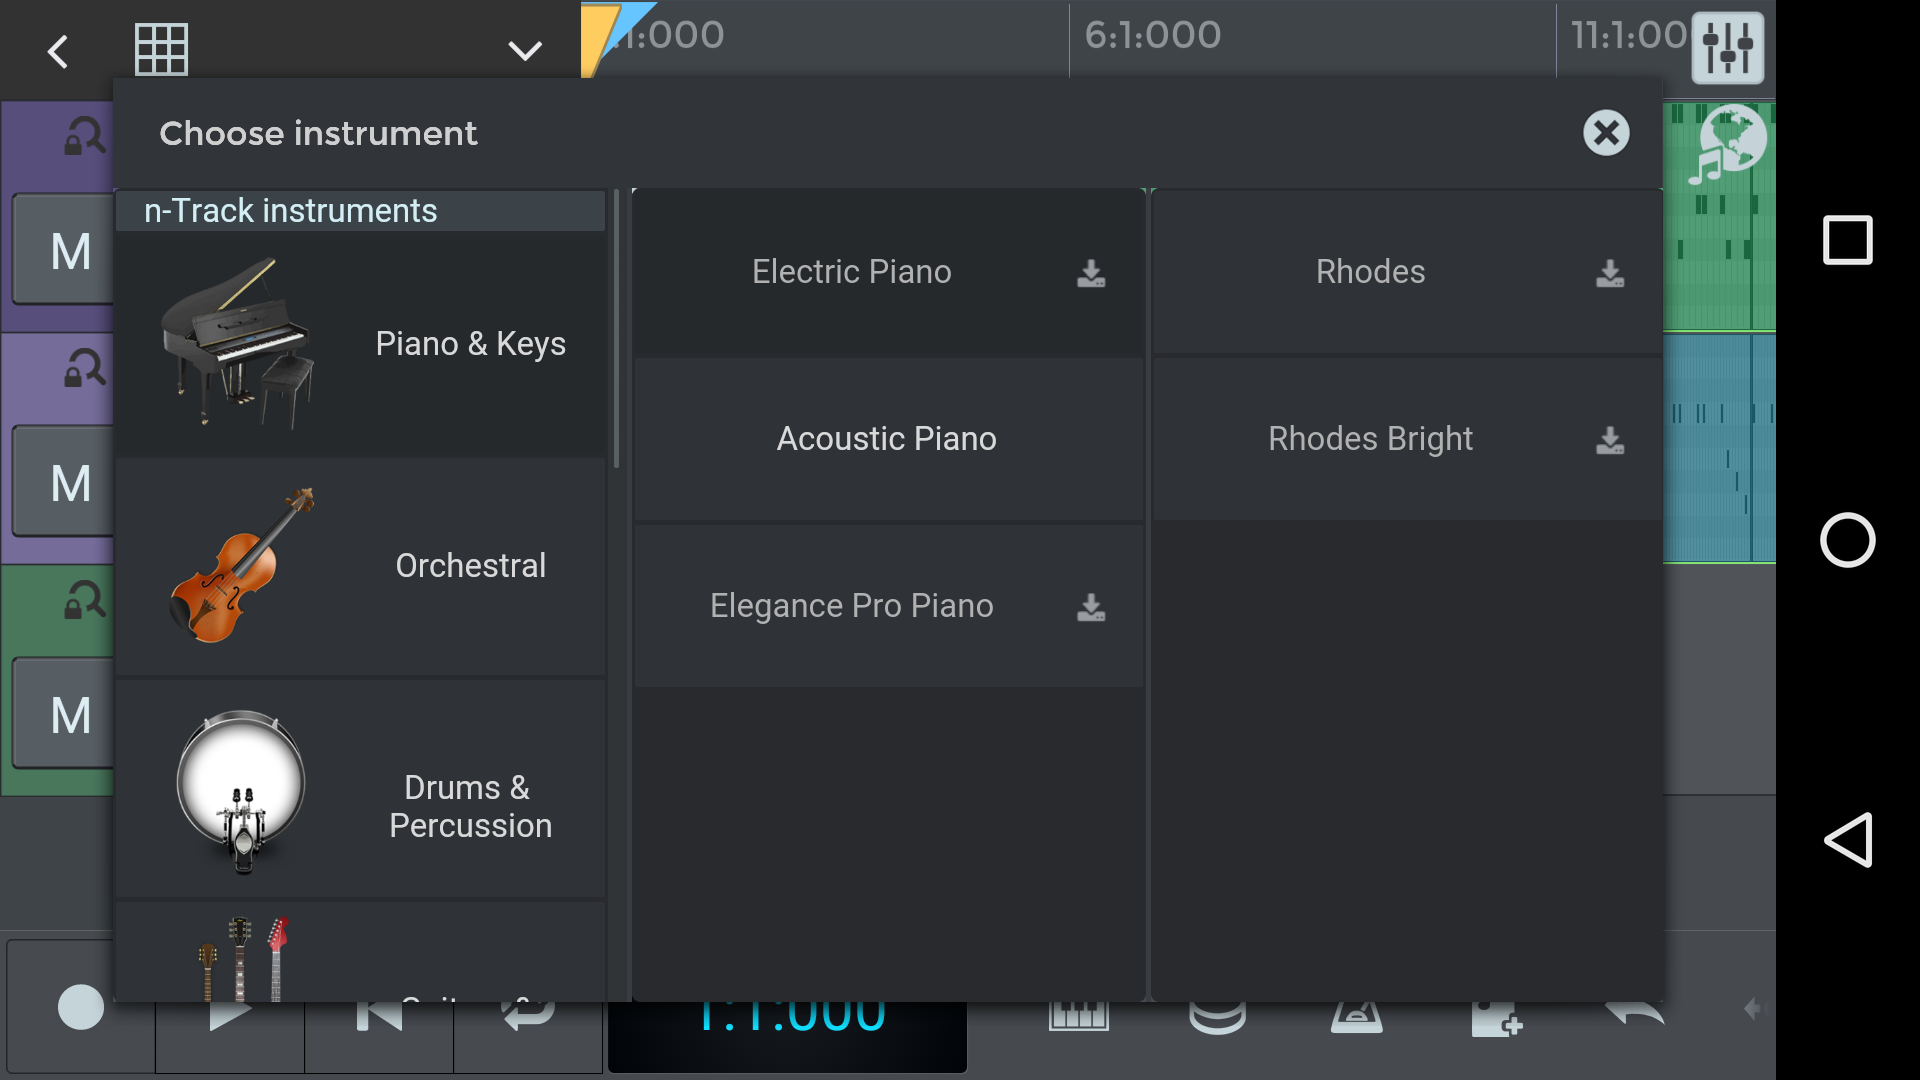
The instrument browser lets you choose the instrument you want to play via MIDI. It will popup when creating instrument tracks, or when you tap on a MIDI track’s output slot, so you can easily choose a new instrument or switch the sound on an already created instrument track.
The browser is organized in three sections:
When you select an instrument from the instrument browser, n-Track will create a new instrument channel with the instrument loaded up, and assign it to a MIDI track.
If this is the first time you open the instrument browser, you may need to download additional instrument packs in order to have more choice than the few built-in sounds. Selecting the sound will bring up the Add-on manager, where we can download content.
The Add-on manager lets you download free and premium instruments, sounds and drumkits available for use in n-Track.
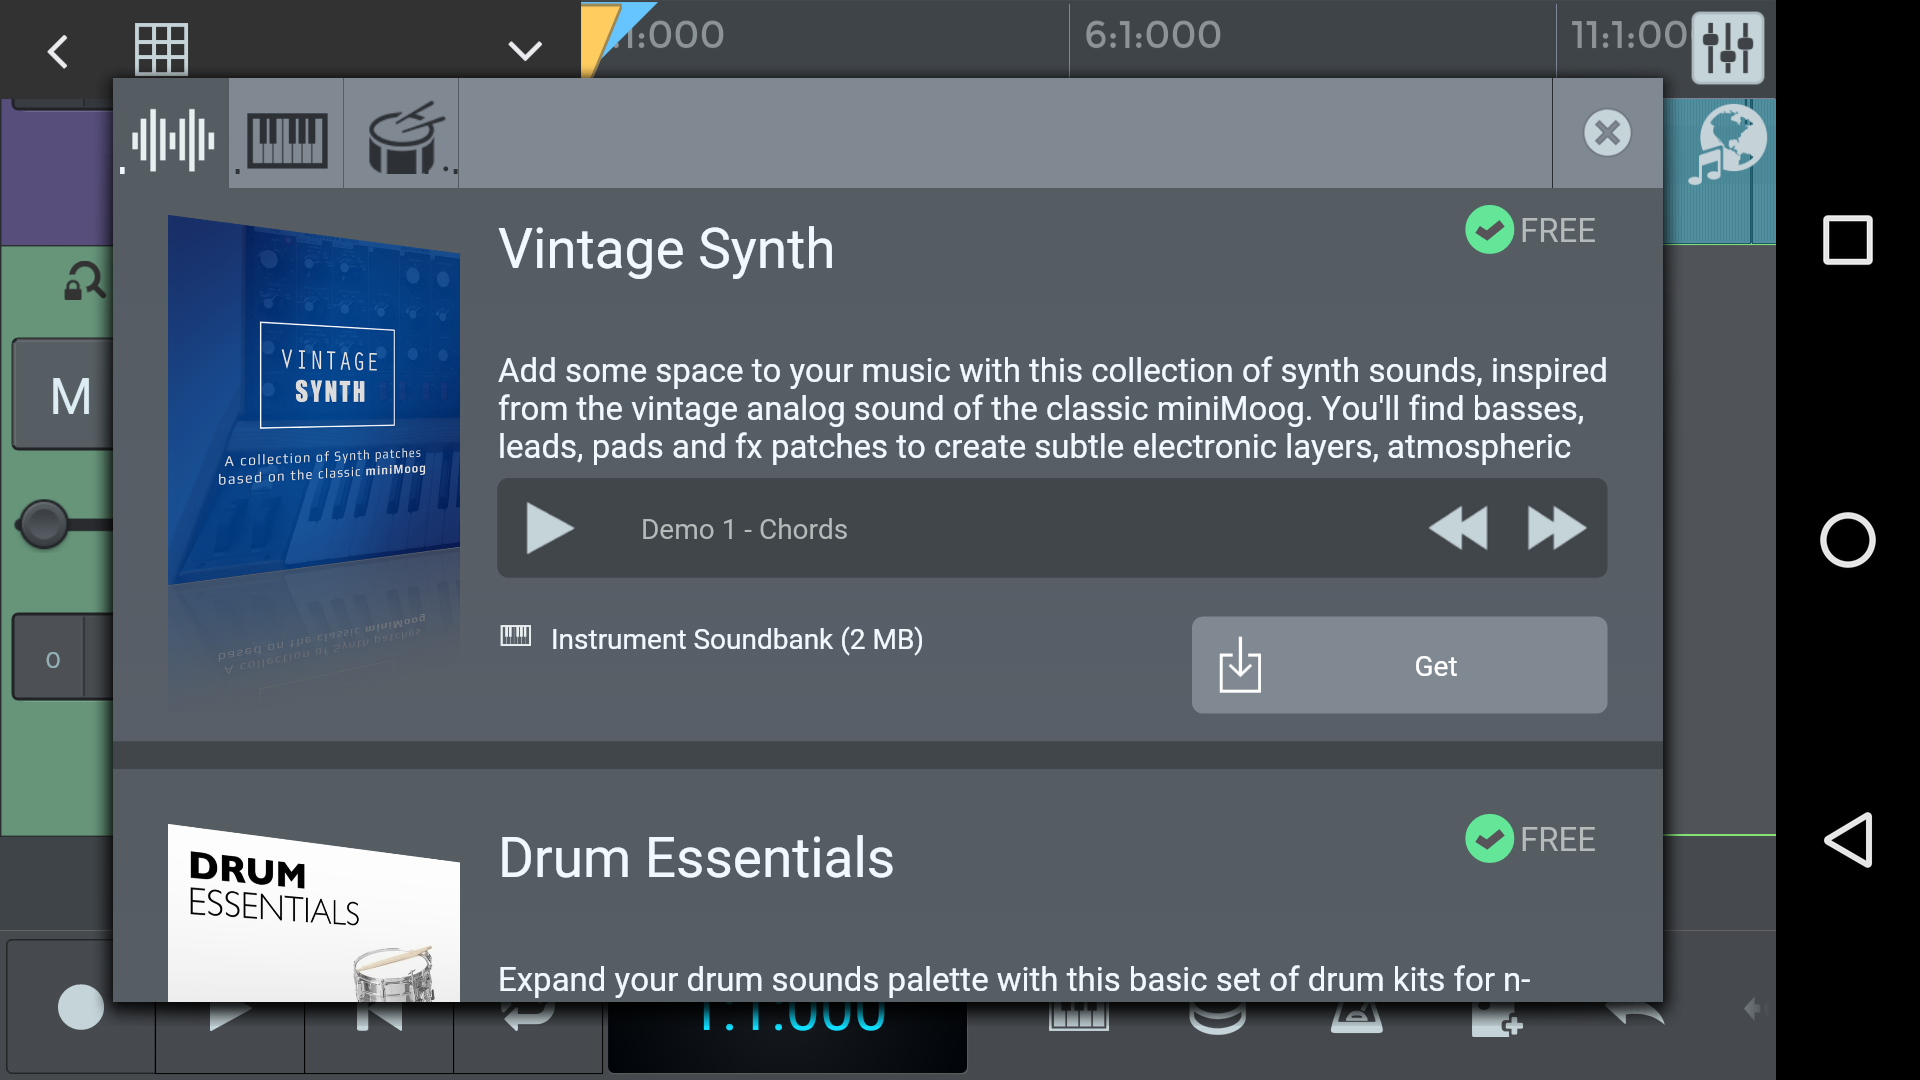
Here you can download free and premium instruments, sounds and drumkits available for use in n-Track, which will be automatically once downloaded.
To download a sound, just tap on “Get". The sounds will then be downloaded and automatically installed. Once installed, you'll be able to play and record the instrument, and load it directly from the instrument browser.
Saving a project means your project and all of its settings will be saved in a format you can open exclusively in n-Track (the .sng format).
To save a project, just push the Menu icon and select “Save song”. You can then re-open your project at any time by selecting the “open song” option.
Exporting, or ‘mixing down’ a track means that all the tracks of your project will be bounced down to a single audio file, in the format you specify, like mp3, wav, and so on.
Once mixed down, your song will be playable anywhere, but please note that exporting track, as well as other features, are limited in the free version. To export songs, you need to either pay for an n-Track subscription, or activate the full version, both of which you can do directly from the app.
The free version allows exporting the song but adds a short audio add at the beginning of the exported track.
Although the free version limits exporting to audio files, you can freely upload the track without audio ads to Songtree, the free music collaboration platform, and then share it via a link.
To export your track, tap the “menu” icon and select “Save Song”, then choose Mp3 or Wav as the same format, then press “Ok”. If you selected Mp3 the app will also ask you to set the tradeoff between audio quality and file size (i.e. bit rate).
 Songtree is a free music collaboration platform that allows to collaborate with other musicians in building songs online. Songtree is developed by the same team behind n-Track.
When someone uploads a song to Songtree, it becomes available for others to contribute to and build upon. Each contribution added by users creates a new version of the song, while the original song remains un-affected. As more people add their contribution, a 'tree' of songs starts to take shape, with each contribution branching out from the original song.
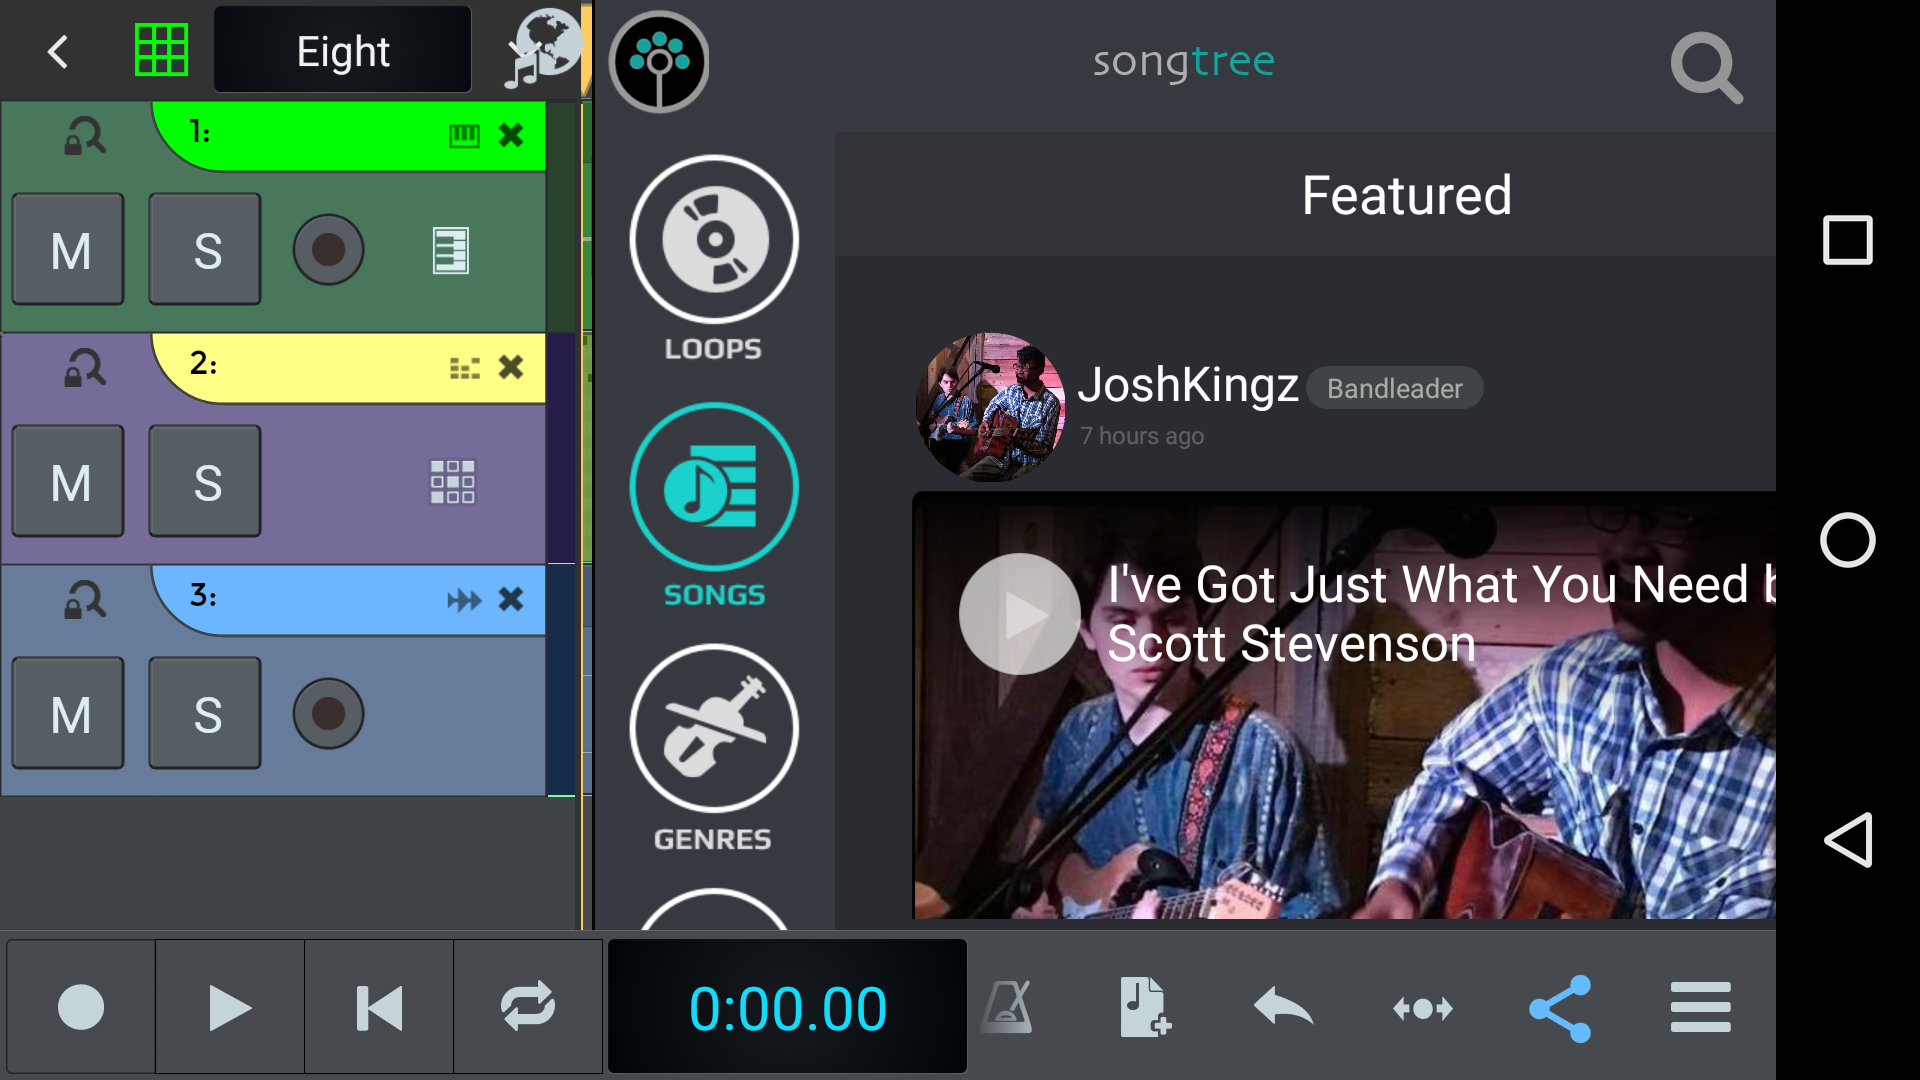
Songtree is available as free web, iOS and Android apps. The apps allow you to record your performances directly from your device, as well as letting you interact with other musicians via comments, likes, invites etc.
Songtree is fully integrated inside n-Track Studio 8, so that you can overdub other Songtree users songs without leaving n-Track.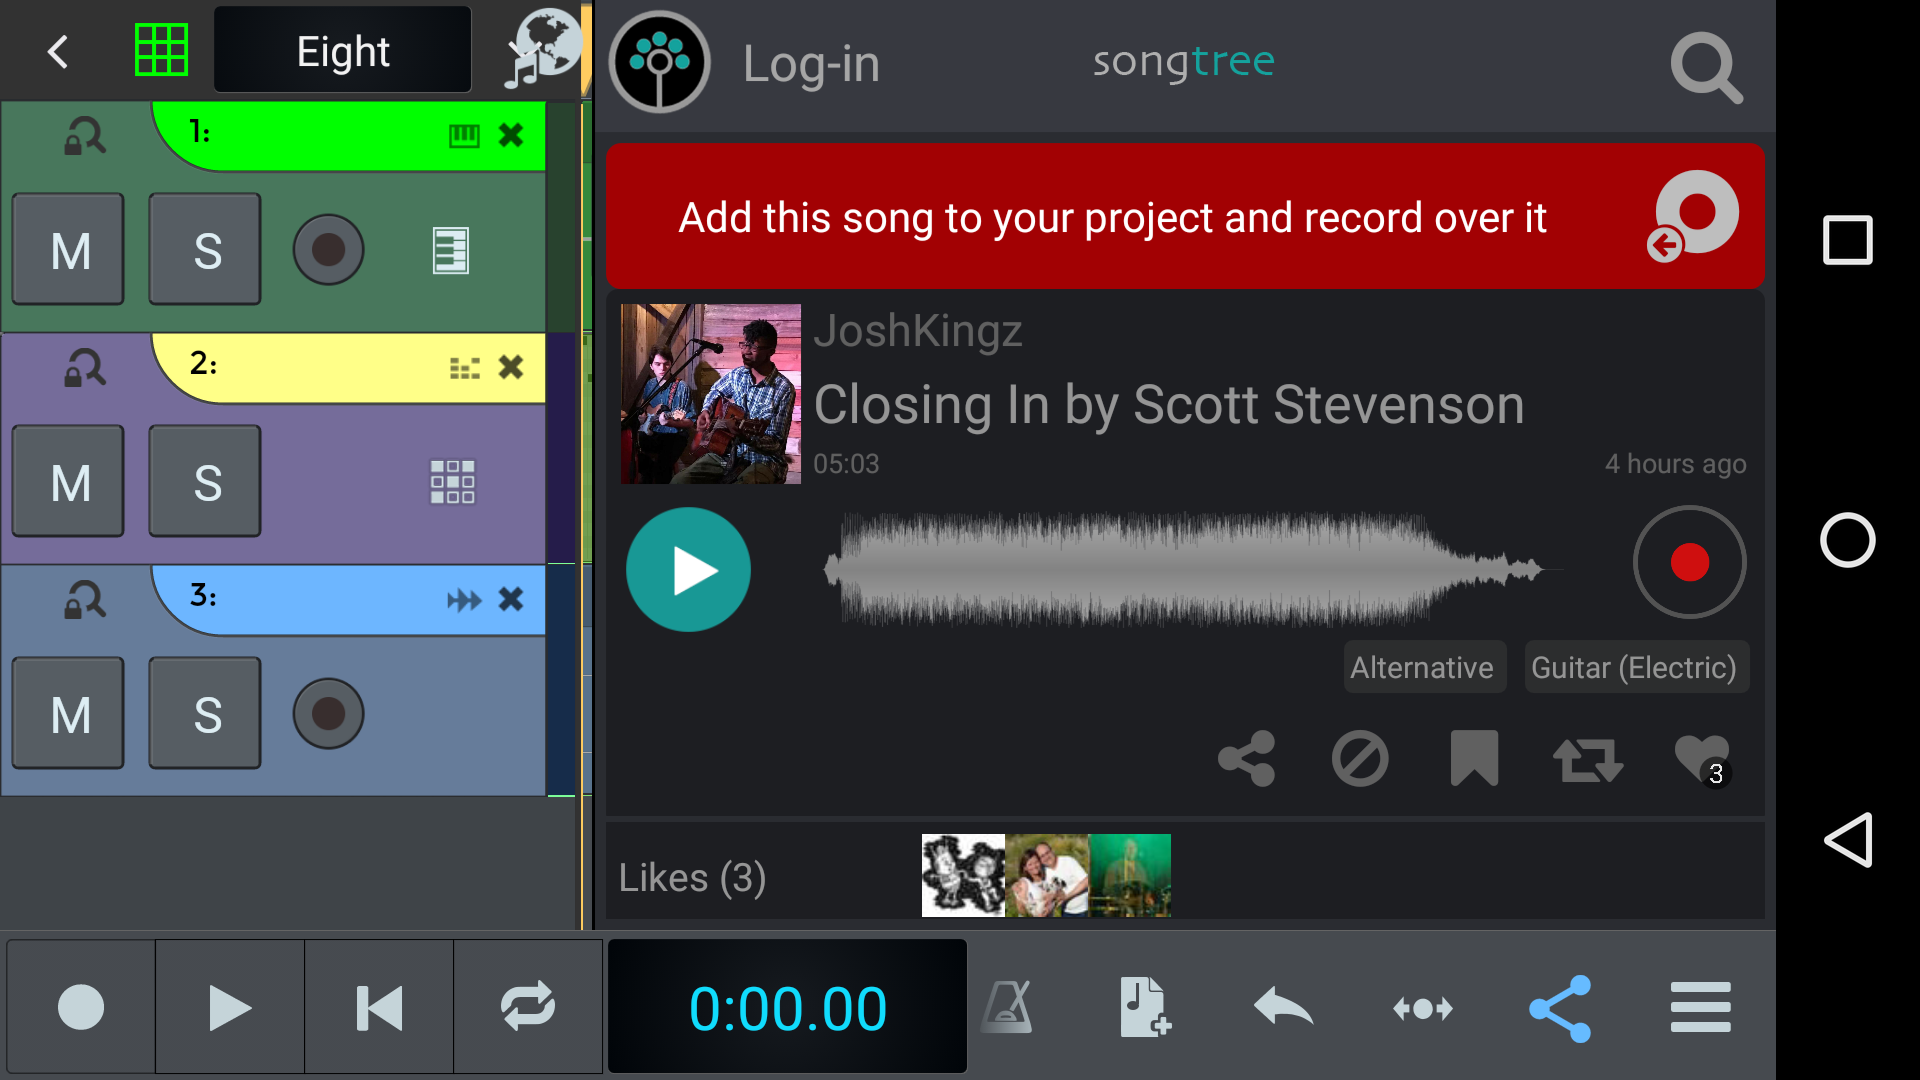
On Songtree you can find other musicians to collaborate with, share ideas, or just jam with. To open Songtree just tap the “globe” icon. Then click on the top left icon and select “login” to access your account or create a new one. You can also sign in with Facebook or Google and gain instant access. We invite you to take a look at what’s happening on Songtree, you may be surprised!
When you save a song in the n-Track native .sng format, n-Track creates a folder with the name of the song, and inside the folder saves the .sng file, and an Audio subfolder where all the audio files used by the song are stored.
If instead of saving in the app home folder you save a new .sng file inside an existing song's folder, then n-Track will only save the new .sng file, and the audio files will be shared among all the .sng files saved in the folder. This allows creating multiple versions of the same song without always duplicating all of the audio files.
Also to note the fact that when you use the Open song or New song commands, the app doesn't ask if you want to save. It just saves, while it also creates a snapshot of the version of the song before the last save, so that you can always go back to any previous state of the song. You can access the snapshots in the Snapshots subfolder, or using the Manage song -> Restore snapshot command in the main menu.
Everytime you delete a file or songfile, the files are not permanently deleted, they are instead copied to the Trash subfolder in the song folder. This allows reverting an accidental delete. The files in the Trash are automatically deleted when they are one week old.
This song folder structure is designed to keep the n-Track files well organized, to avoid accidental loss of recordings, and to be able to easily identify all of the audio files used by a certain song.
After you've worked on a song for an extended period of time, you may notice that the Audio subfolder of your song becomes populated with a large number of audio files. That is because n-Track never deletes an audio recording, even when it is removed from a song.
When your song is in a stable state and you're sure you don't want to undo the removal of audio tracks, and you need to free up some space on the device storage, you can use the Manage song -> Cleanup song folder menu command to cleanup the song folder, moving to the Trash all of the audio files that are no longer referenced by any of the .sng files in the .sng folder. This will also delete all of the snapshots of the song in the Snapshots folder.
In previous chapters, we saw how to add and arm an audio track, how to record instruments or vocals, and how to upload a base track, or backing track, and record over it. We also talked about editing parts and adding effects.
In the following sections we’ll give you some tips to obtain a better sound from your recordings because in fact, although we’re working on a mobile app, all we need is minimal extra hardware and a little extra knowledge to make our recordings sound clear and professional.
Many modern Android devices have good quality mics, so if you plan to only record vocals or acoustic instruments, one simple option is to just use the Android device builtin mic. To do that you just have to connect a standard set of headphones (the ones you use to listen to music, not the ones you use to talk on the phone) and n-Track will automatically recording from the device built-in mic while sending audio to the headphones. If you instead connect a phone headset the app will record from the headset mic, which may not always be what you want as the quality of that mic may not be very good.
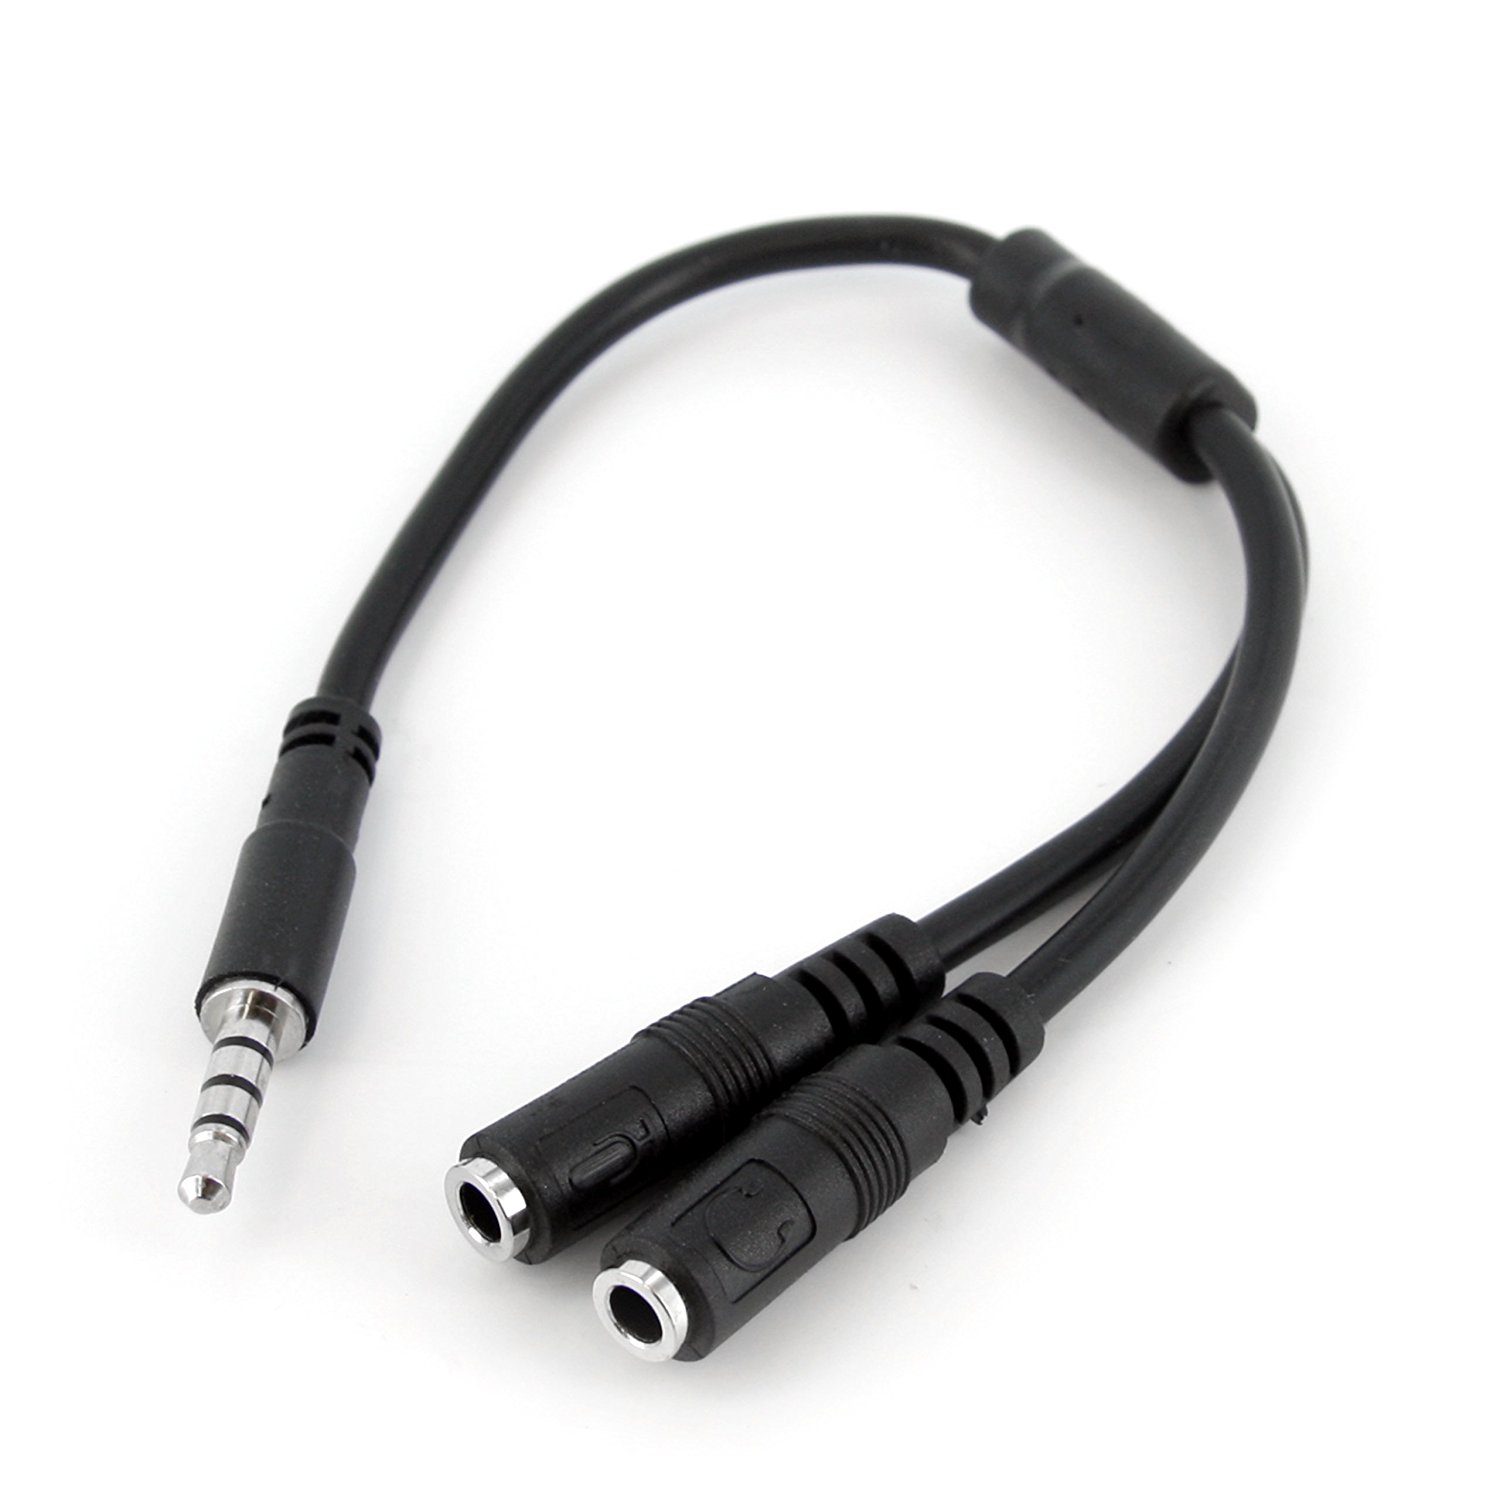
If you want to record electric instruments or want to use an external high quality microphone, you have two options:
A cable such as the one in the picture below is very inexpensive. Simply connect the male connector to the Android device and a mic to one female connector and a set of headphones to the other.
n-Track Studio support external USB audio devices. n-Track can accesses USB audio devices directly using its own custom USB driver, or can use Android standard USB driver. While the Android USB audio driver is getting better with newer versions of Android, the n-Track driver bypasses the Android audio system so it typically allows for lower latency. The custom n-Track USB audio driver may however not work on all Android devices + USB devices combinations.
See below for a list of the devices we've tested.
As far as specific models go, you can choose among many different solutions in many different price ranges to fit your specific budget and needs.
To connect your external sound card, just plug it to your device using the interface’s connector cable.
Once plugged in, n-Track will detect your device automatically. You’re now ready to record. Just make sure that the recording input is set to the soundcard input you wish to record. You can do this via the arm button, as we saw in previous lessons.
Launch n-Track, then connect the USB audio device to the Android device.
A prompt should appear asking if you want to use the Android or the n-Track USB driver.
If the USB device isn't recognized or the audio doesn't work correctly please see this USB troubleshooting guide
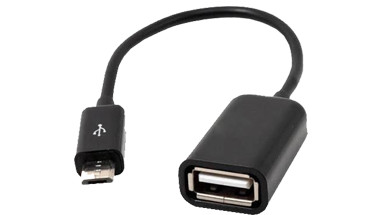
If the USB device has an USB-C connector you'll only need an USB-C to USB-C cable. If the USB device has the classic USB-A connector you'll need a cable with a microUSB or USB-C male connector and a female regular USB connector.
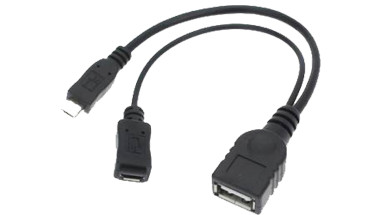
Some USB devices work well with the Android device power. Some other devices need more power and can only work when connected using either a powered USB hub or a splitter cable.
The splitter cable is very inexpensive and can be easily found for example on Amazon or Ebay, searching for "OTG splitter".
Another option is to use a powered USB HUB.
When using multichannel USB audio devices you can record as many audio channels as the audio device allows.
After connecting a multichannel USB device n-Track will by default start using only 2 inputs and 2 outputs. To use more channels change the Max Inputs and Max Outputs settings in the Audio Settings box.
Note that not all devices might be able to handle many input and/or output channels. The more channels you enable the more workload the device must handle. If when you increase the number of channels you hear that the audio starts clicking try to increase the buffering settings in the Audio settings box. See the USB compatibility chart below with notes on recommended buffering settings for specific audio devices.
n-Track automatically detects wether the audio device in use has 24 bit recording capabilities. If that's the case the recorded audio files that n-Track generate will use the 24 bit audio format.
24 bit recording currently works only on external USB audio devices, the Android built-in audio device is 16 bits only.
In some scenarios, you may wish to control a track’s routing options, meaning the input and especially the output destination of the track’s signal. This may be useful when, for instance, you want to group various tracks together to control their overall level or eq. Or, you may wish to record the output of various tracks into a new audio track, or perhaps send the signal from various tracks to an effect.
You can control each track’s input/o utput settings via the mixer. This is where you can decide to route a track to another. For example, apply a send effect. Send effects, as opposed to insert effects - which affect the entirety of the track’s signal - allow you, for instance, to have a single reverb effect and send different amounts of your tracks to it.
For example, let’s apply a reverb to an audio track, first as an insert effect, then as a send effect.
To apply a reverb as an insert effect, all you need to do is pick the effect from the track’s effects panel. This will let you choose an effect to apply, which will affect the entire signal (or better, the amount set by the dry and wet parameters) before passing it to the output.
You can also add effects using sends. A send allows you to send a track’s signal to an auxiliary track, which will be the host of the insert effect. This allows you to send different tracks to the same effect in different amounts, controlled by the send amount knob.
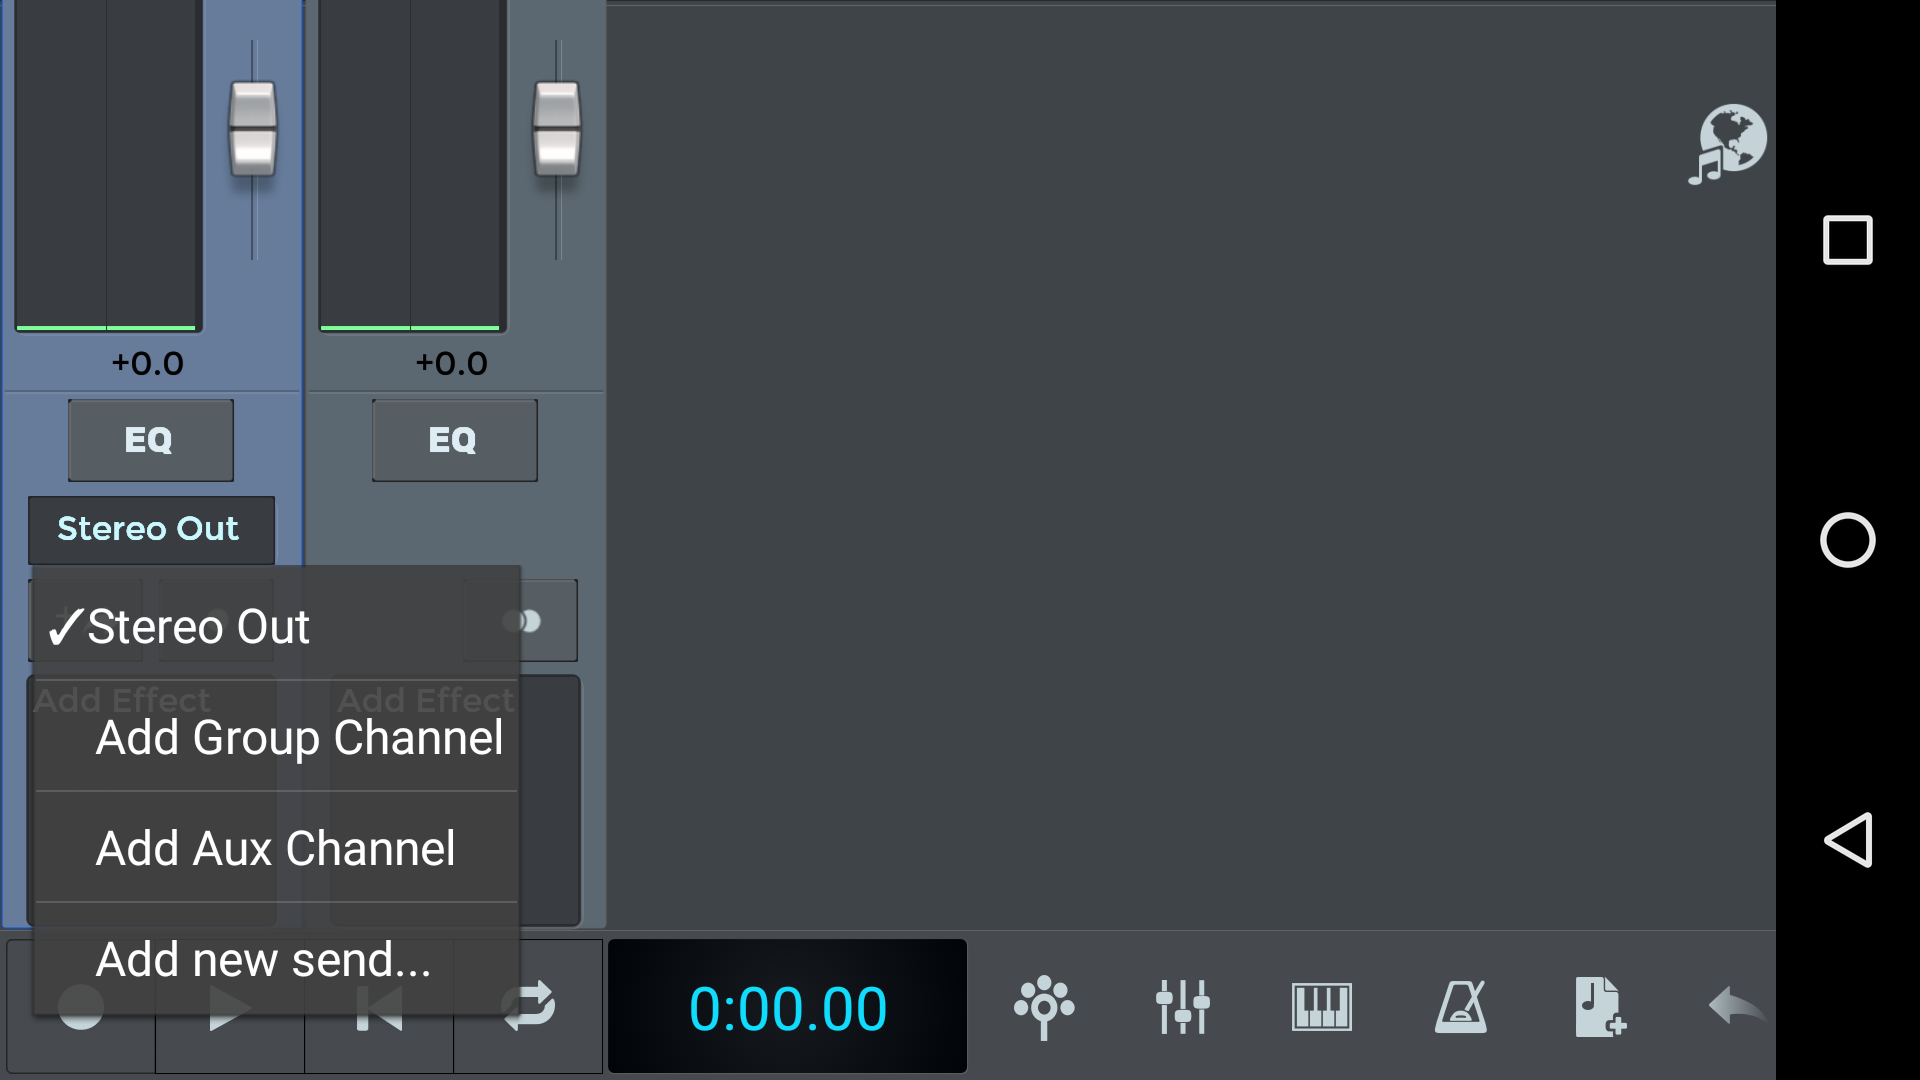
To add a send effect, open the mixer.
Then tap the add effect button  or tap this little window
  and choose "add new send".
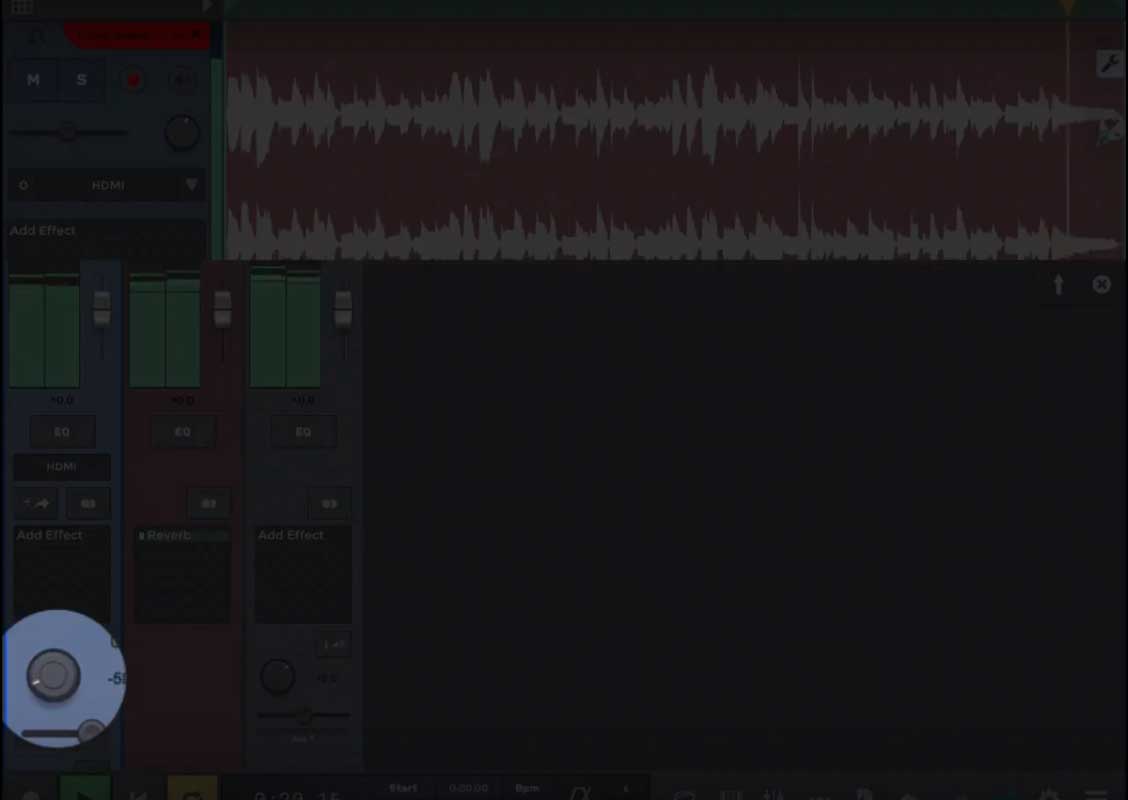
As you can see, a new Aux track was automatically added to your project. Now all we need to do is add an effect on Auxiliary track. To do this, just tap the "add effect" panel of the Aux track and choose an effect. We’ll give the reverb 100% wet and 0% dry signal, since the dry component will be coming from our original track, and the auxiliary track will only provide the signal with the effect applied.
We can now control the reverb amount using track one’s send knob.
When you mix a song, you’re usually looking to make every element in your song be heard clearly and fit well with the other elements, both as far as level and frequency content are concerned.
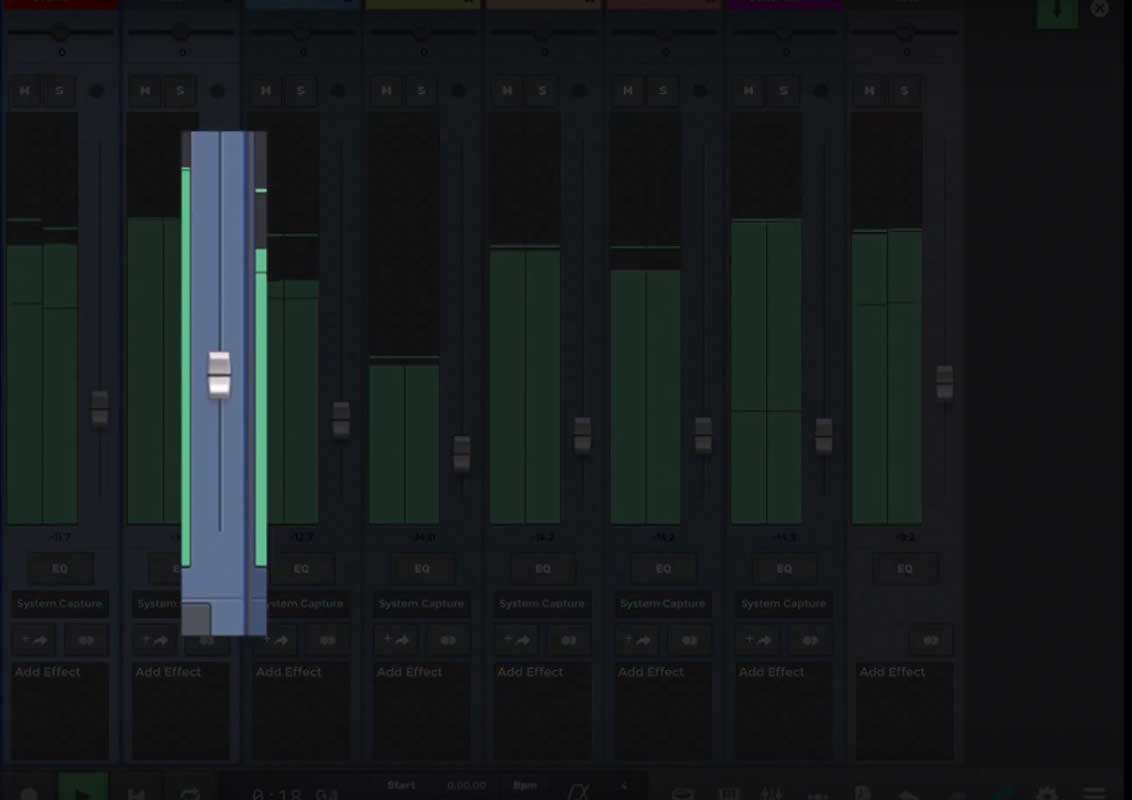
You can control each track’s level via the mixer sliders. For instance, if our bass is too quiet compared to the drums and guitars we could bring up it’s level.
Another thing to consider is the frequency content of the elements in the mix. Although this depends on the genre of music we're working on, on our artistic intentions, our taste and so on, it’s generally considered a good practice to make sure that various sounds in your mix don’t clutter a particular frequency band. For instance, we want the main bass frequencies in our song to come from the bass guitar, rather than the guitar
First of all open the mixer view and tap the EQ icon of the channel we want to modify, then start modify frequencies. We might then choose to apply a high pass filter to the guitar to carve out room for the bass frequencies to stand out without interference from other low-end frequencies coming from the guitar, resulting in a clearer mix, in which we can actually hear all the individual elements more clearly.
Previously, we had a look at how to add a virtual instrument track, how to download virtual instruments for free and how to record midi tracks.
The objective of these following lessons is to bring you to next level of using MIDI for creating your music with n-Track Studio.
In the previous lessons we learnt how to set up our virtual instruments. This time we’ll look at how to actually play or program these instruments, whether by connecting controllers or by using the program’s built-in tools and editors.
Once you’ve added a new blank midi track and selected an instrument from the instrument browser, then you need to play it. n-Track lest you do this in various differents ways.
One way is using the built-in virtual keyboard, that you can play immediately, via touch gestures on your device. To open the virtual keyboard, just tap the “keyboard” icon on the track bar and start playing.
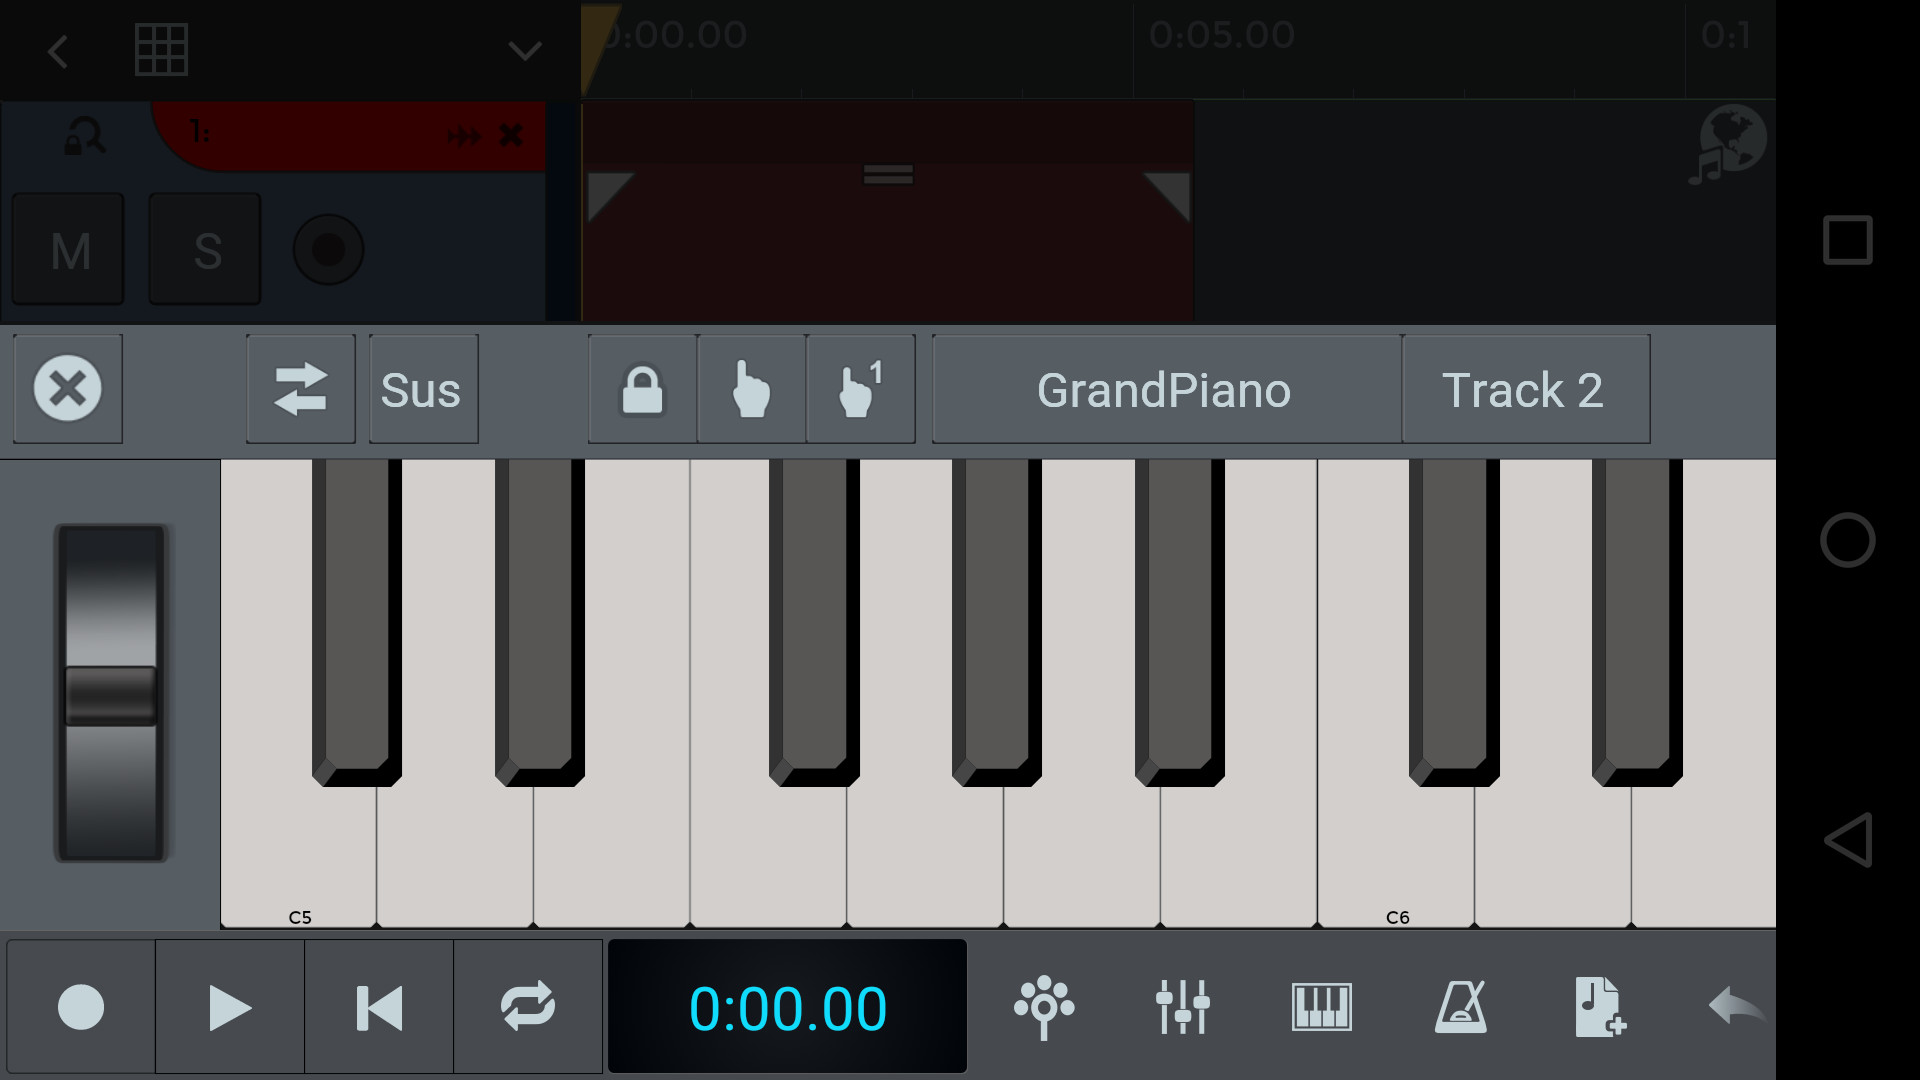
The screen keyboard presents different controllers in order to simulate an actual real keyboard:


Another built-in controller is the drumkit controller.
Some drum or percussive virtual instruments loaded from the instrument browser will call up this kind of controller, more appropriate for playing these kind of sounds.
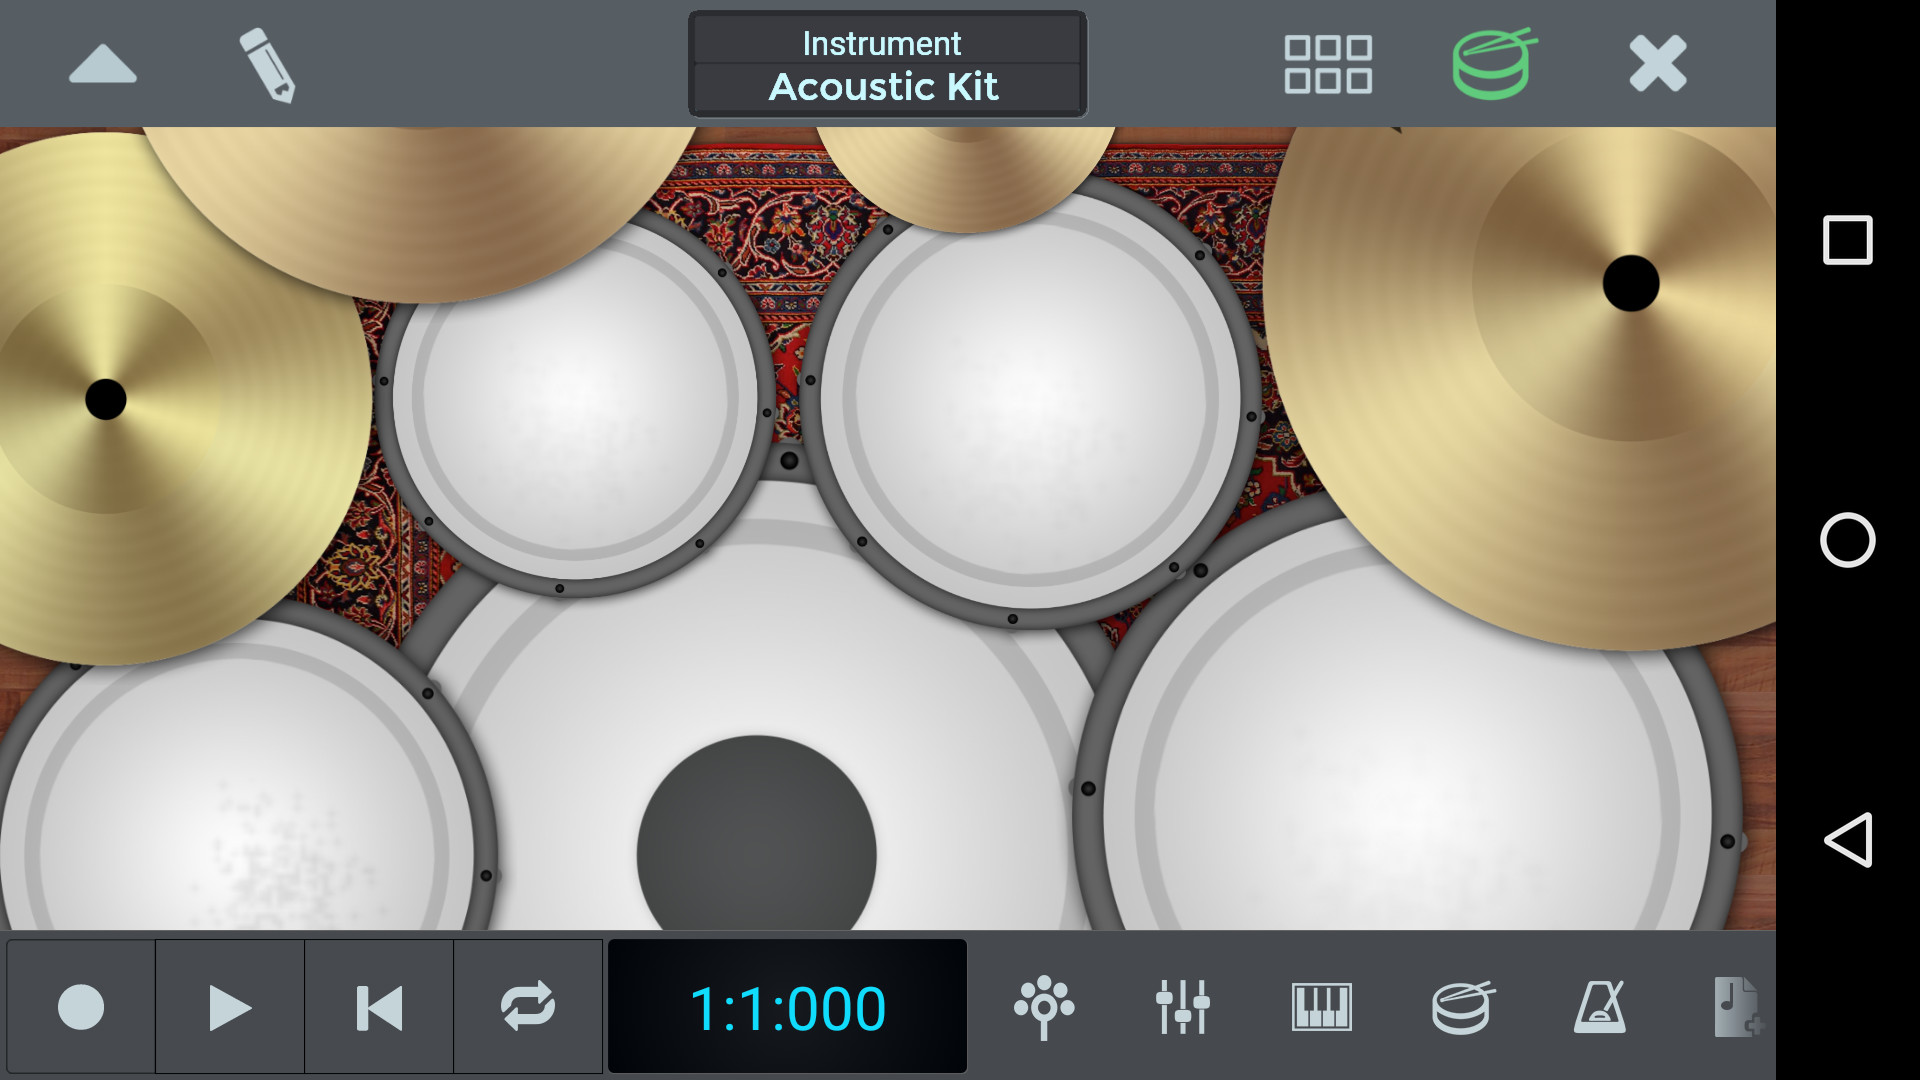
To open the drum controller, simply tap the “drums icon”  . You can now play the kit’s elements by using your fingers. You should notice that in this "acoustic" view, some kit elements trigger different sounds depending on the area you hit.
There is also a more "electronic" layout, which features drum ‘pads’, similar to those you would find on a hardware controller or drum machine.
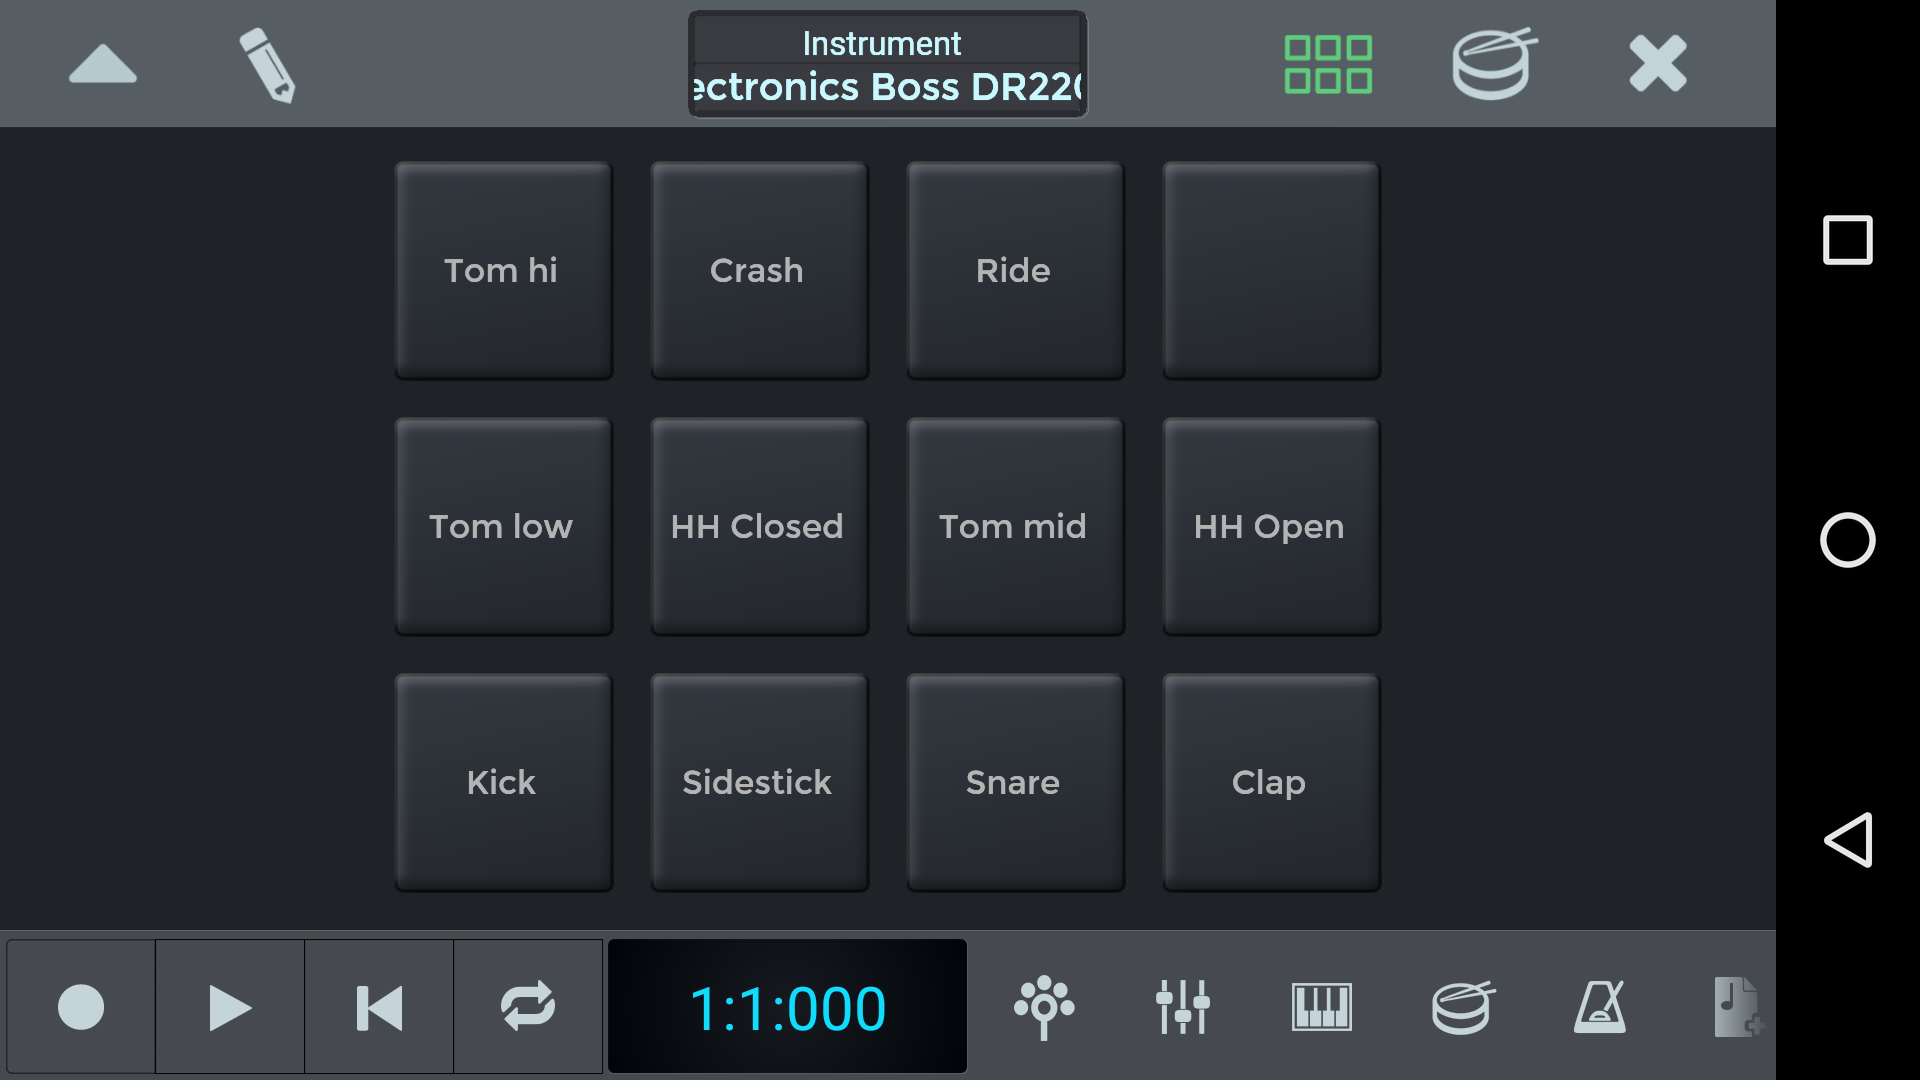
To change the instrument we’re controlling, simply tap the instrument name on the top center of the screen.
A great tool to write midi sequences or create rhythms is the step sequencer. The step sequencer lets you compose rhythms and songs using smaller pieces - called patterns - as the building blocks for more complex scores.
To open the step sequencer, click “add blank track” ![]() , and then “add step sequencer track”.
, and then “add step sequencer track”.
We can see the step seq in full screen by clicking this icon  Now, write your sequence, and then hit play.
We can add or remove steps from our sequence with the "add step" button
Now, write your sequence, and then hit play.
We can add or remove steps from our sequence with the "add step" button  or "delete step" button
  .
.
Now lets enable the pattern view by tapping this icon 
Each step sequencer track can operate in one of two modes:
You can switch between the two modes at any moment, using the mode selector. 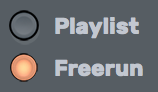
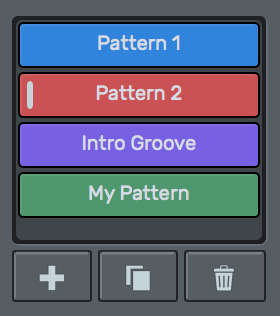
While in freerun mode, create a new pattern in the pattern roster, tapping on the add button 
The pattern roster contains all the available patterns for the track, you can think of it as a toolbox filled with rhythms ready to be used.
After creating several patterns in the roster, you can switch among them clicking on the desired one. If the song is playing, you will immediately hear the new pattern right after selecting it.
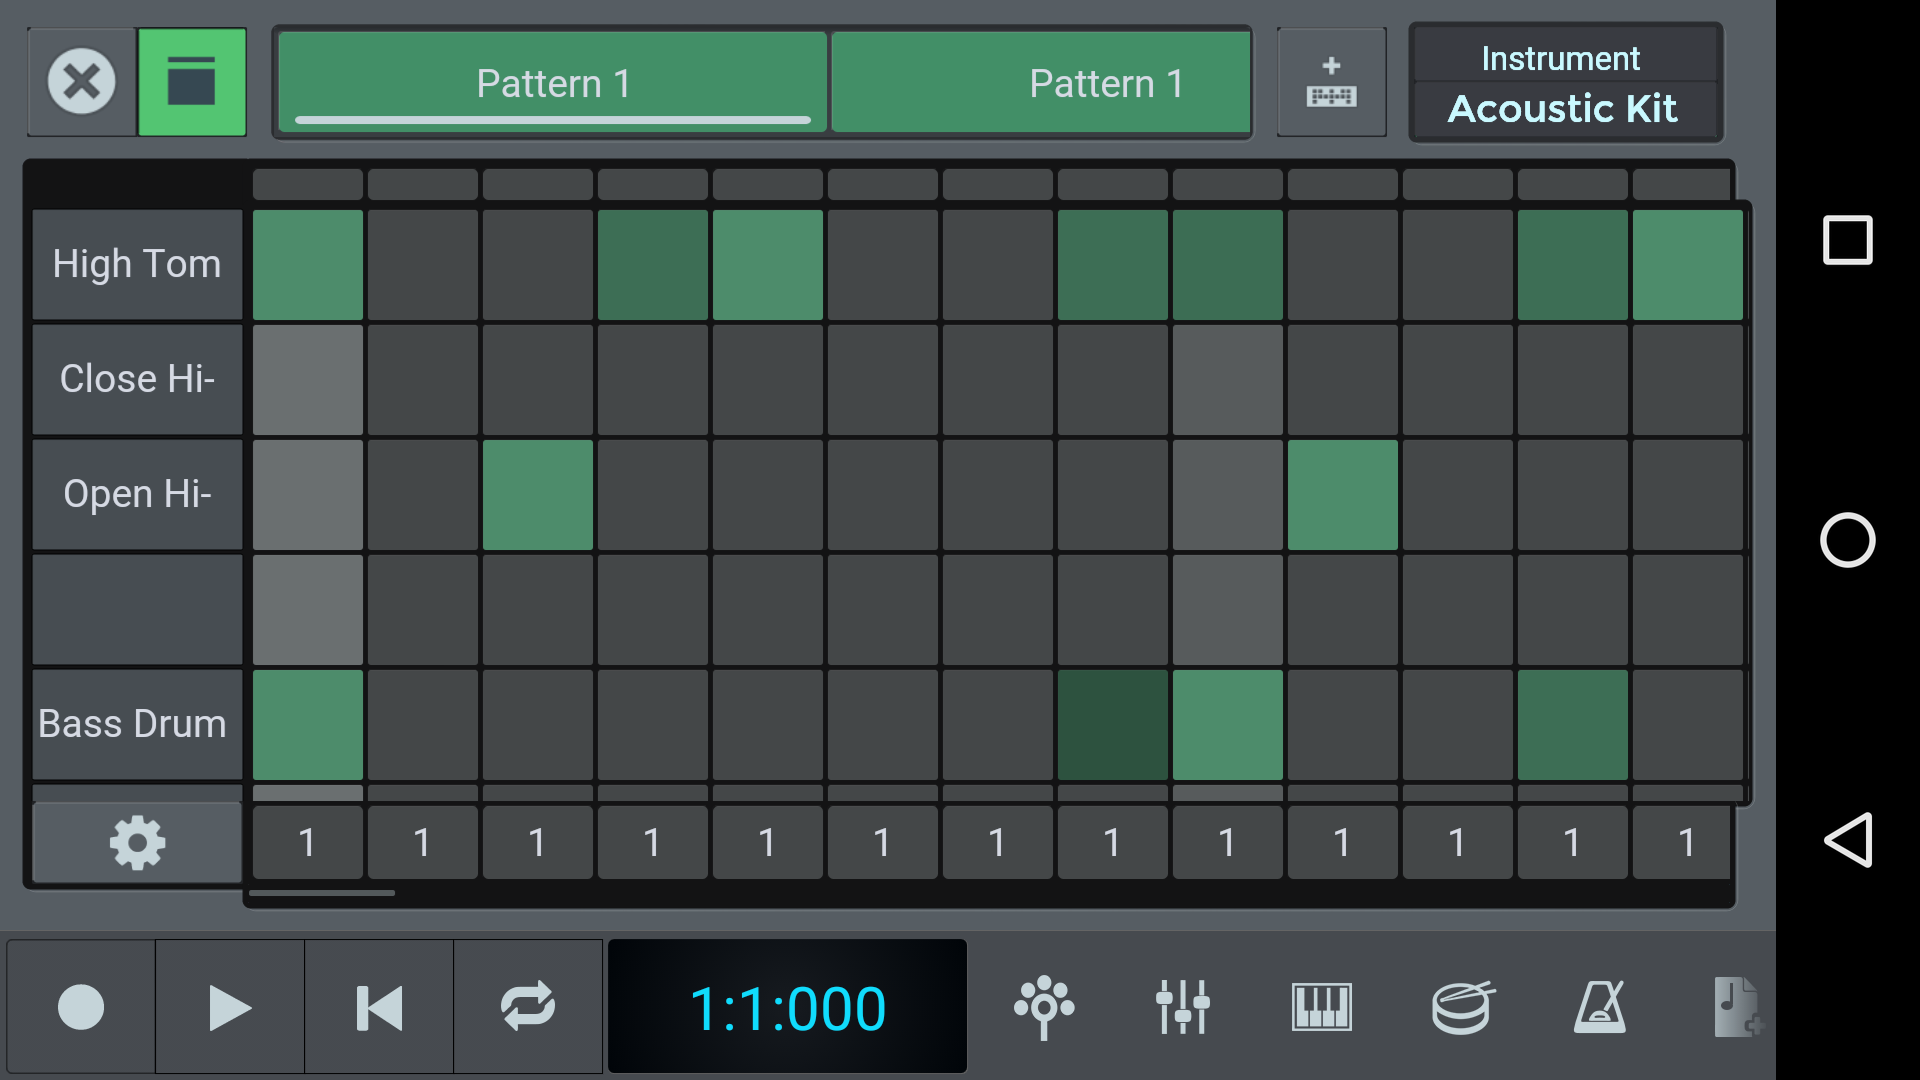
To add notes to the currently selected pattern, tap on a cell in the pattern’s note grid. The cell will light up and the corresponding note will play when the progress cursor crosses it.
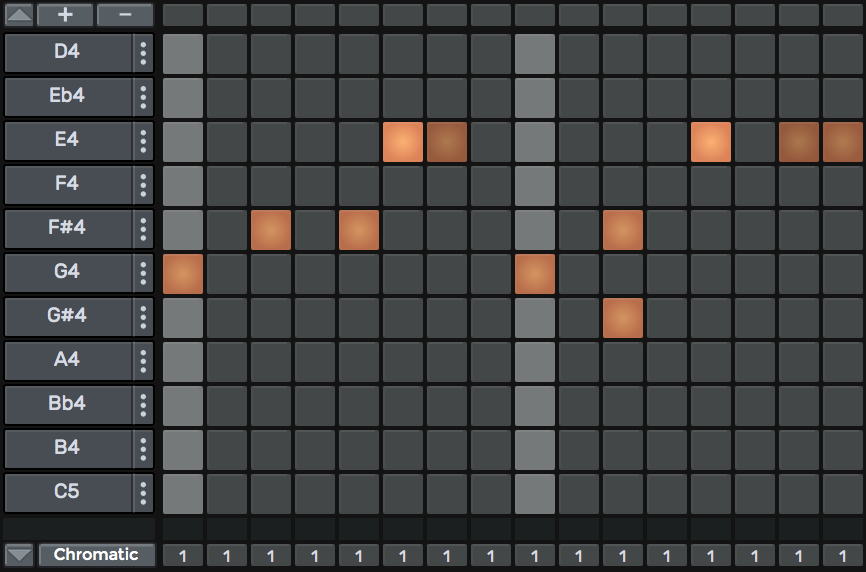
The note for the cell’s row is indicated in the note list, on the left side of the grid.
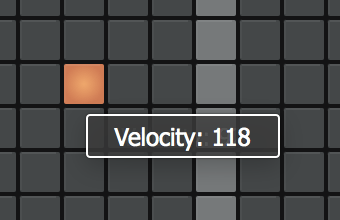
Tap on the note’s button and drag vertically to modify its velocity. The button’s light will dim reflecting the velocity level.
Switch to playlist mode: from now on, patterns in the roster will not be played when you create or select one of them. Only patterns added to the playlist will play in sequence.

To add a pattern to the playlist, click on the button while the desired pattern is selected, or drag the desired pattern from the roster to the playlist.
You can arrange the patterns’ ordering in the playlist at any moment, dragging them where desired.

When playback is activated, the playlist will be reproduced, following the main song time position.
To remove a pattern from the playlist, select it and click the  button. The removed pattern will still be available in the roster for reuse.
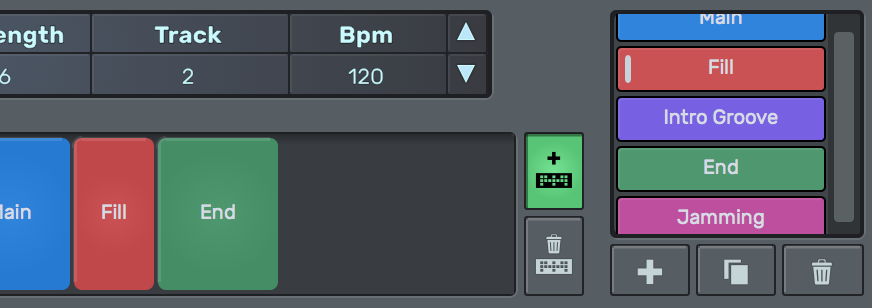
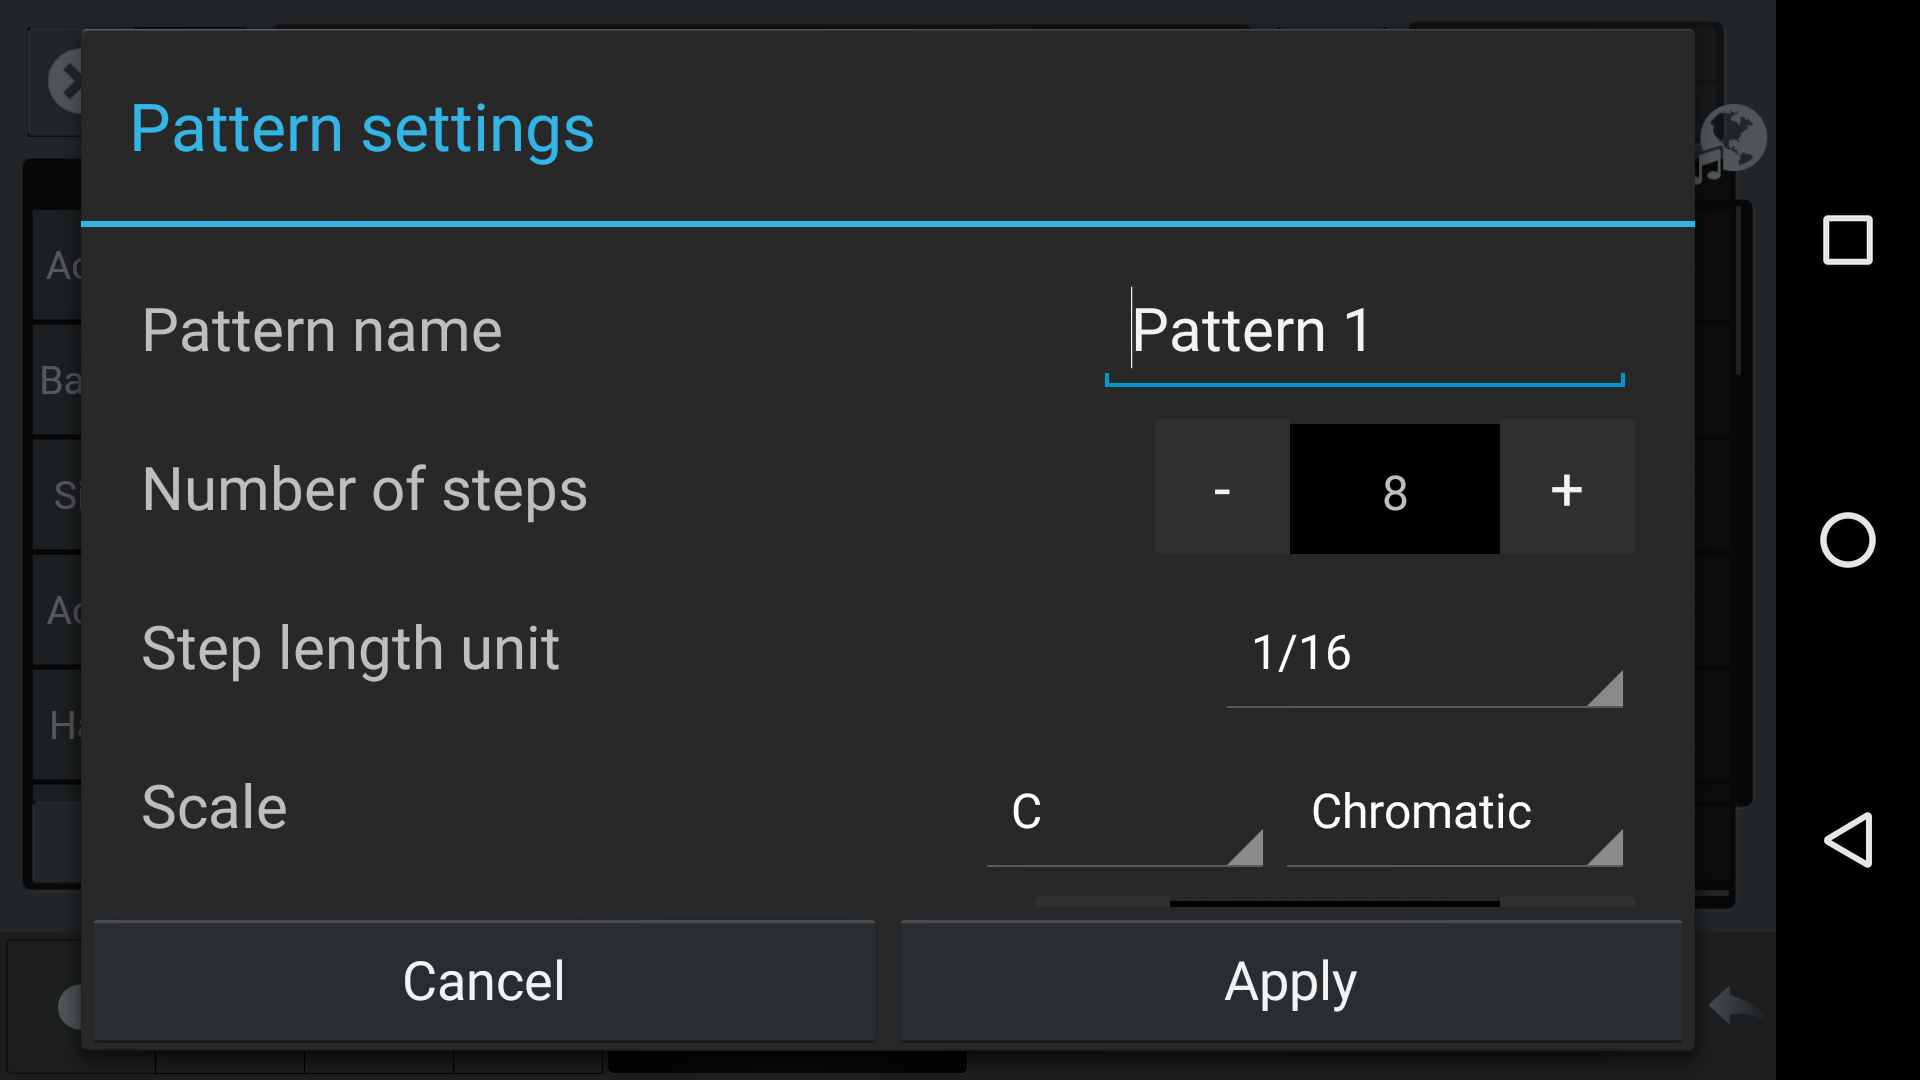
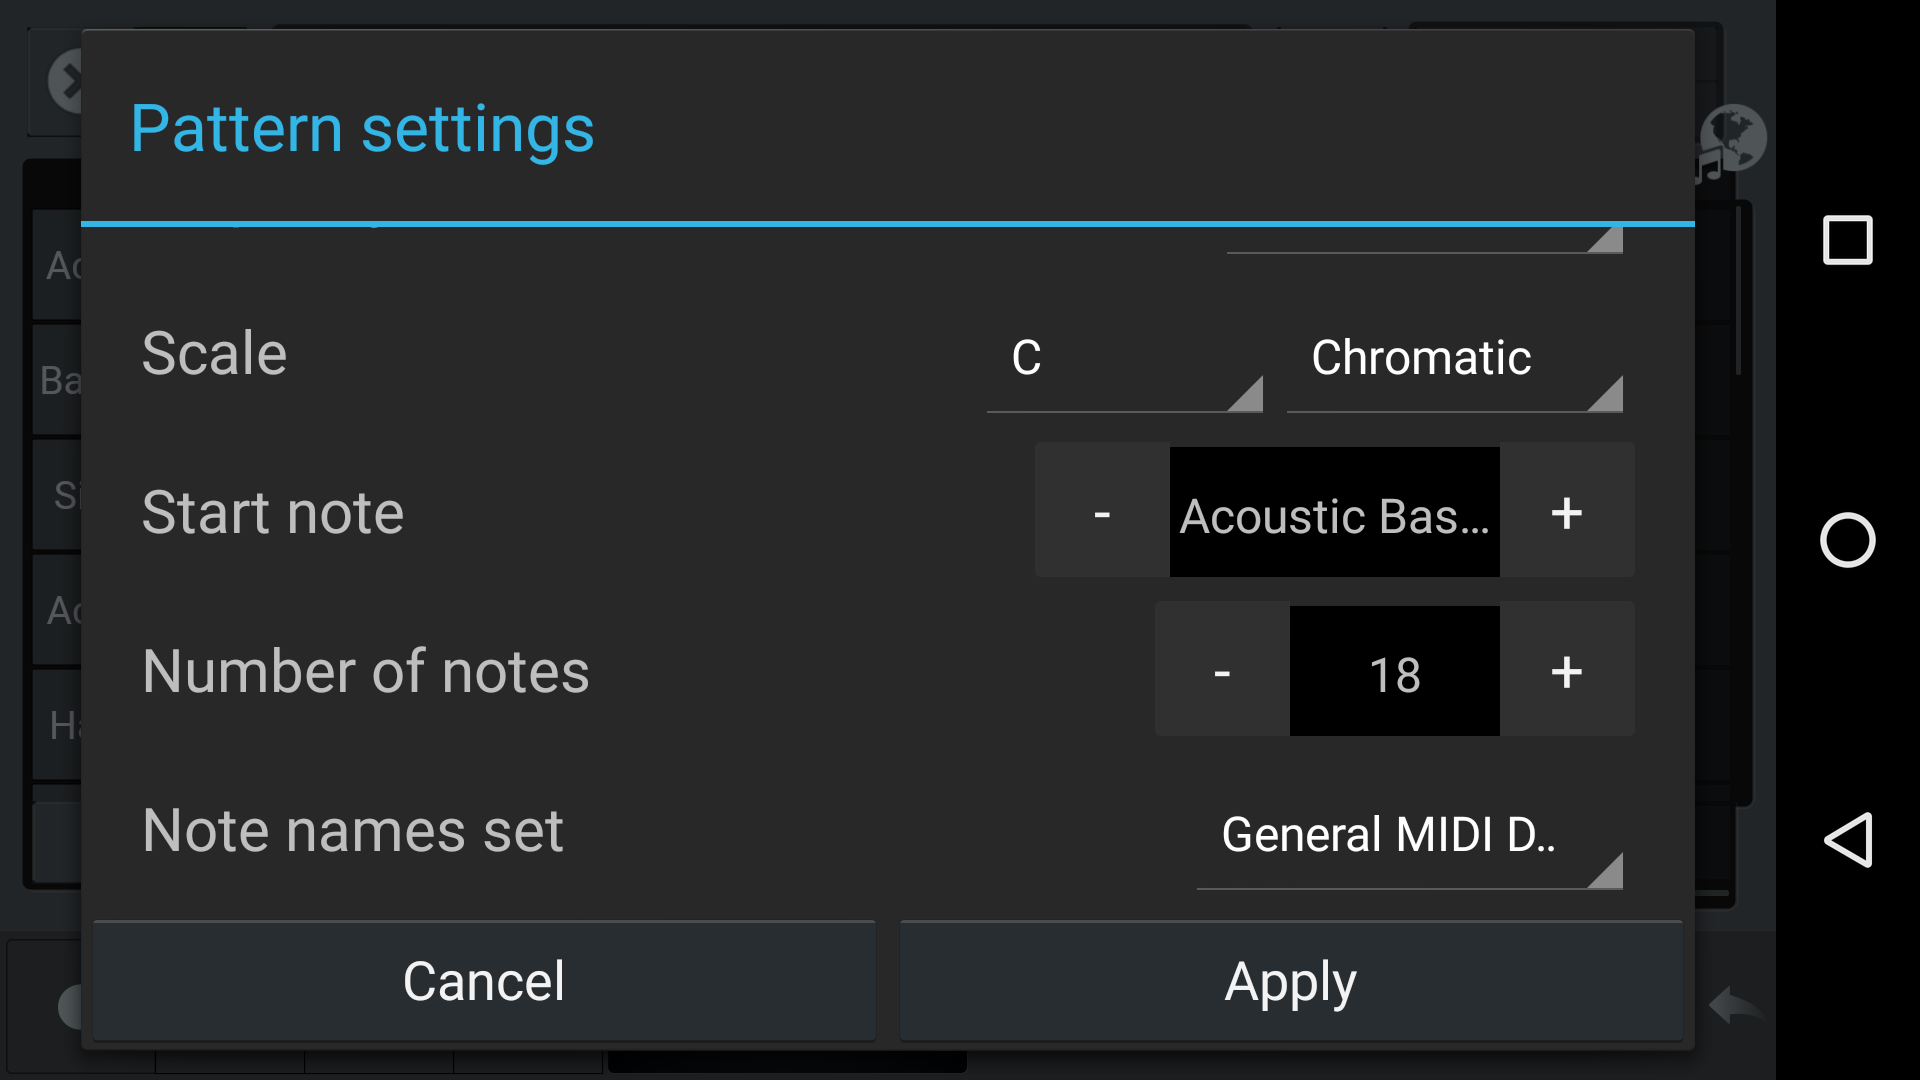
The main settings display shows the most important properties of the selected pattern

Pattern
Steps
Step Length
Track
Bpm
To permanently delete a pattern, click on the  button while the pattern is selected. When a pattern is removed from the roster, it will be permanently removed from the playlist as well, if present there.
Clicking on the  button, the currently selected pattern is copied and a new identical pattern is added to the roster. This is useful to start working on a new pattern that is a variation of a previous one. The modifications performed on the new pattern will not affect the original one.
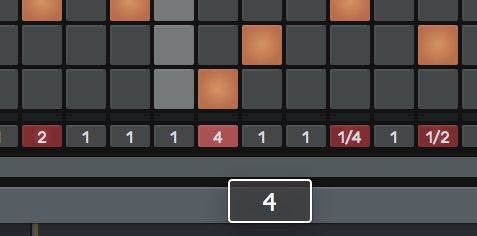
By default, each note has the same length as the time separation between note-on events.
If you need a note to be played for a longer or shorter time, modify the duration value in the note duration row.
A few things to keep in mind:
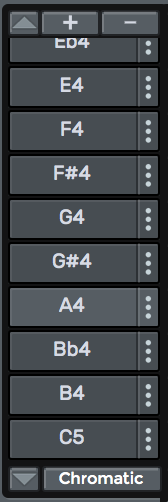
Each pattern’s note grid can have a customized number of rows, each one representing a pitch value. To add or remove rows from the pitch list, click on the  buttons.
You can transpose the note list - and thus the pattern - clicking on the  buttons, and you can even set a custom note for each row, clicking on the
  button and selecting the note from the resulting menu.
From the same menu you can select one of the alternate namings available for the note list.
You can also load specific scales in the midi list, to ease the composition process. Just click on the scale button, and select a major, minor or other type of scale in the desired key from the menu. Click on Advanced to fully control all aspects of the scale generation.
To change the color of a pattern, right-click on it in the roster and select the desired color from the Color sub-menu.
You can also use the piano-roll to write your MIDI parts. The Piano Roll window shows the MIDI events occurring in the track. The most common events are notes, but other types of events (controller commands, pitch bends, etc.) can be displayed and edited in the same way as notes.
To open the piano roll just tap on this “vertical” piano icon ![]() .
.
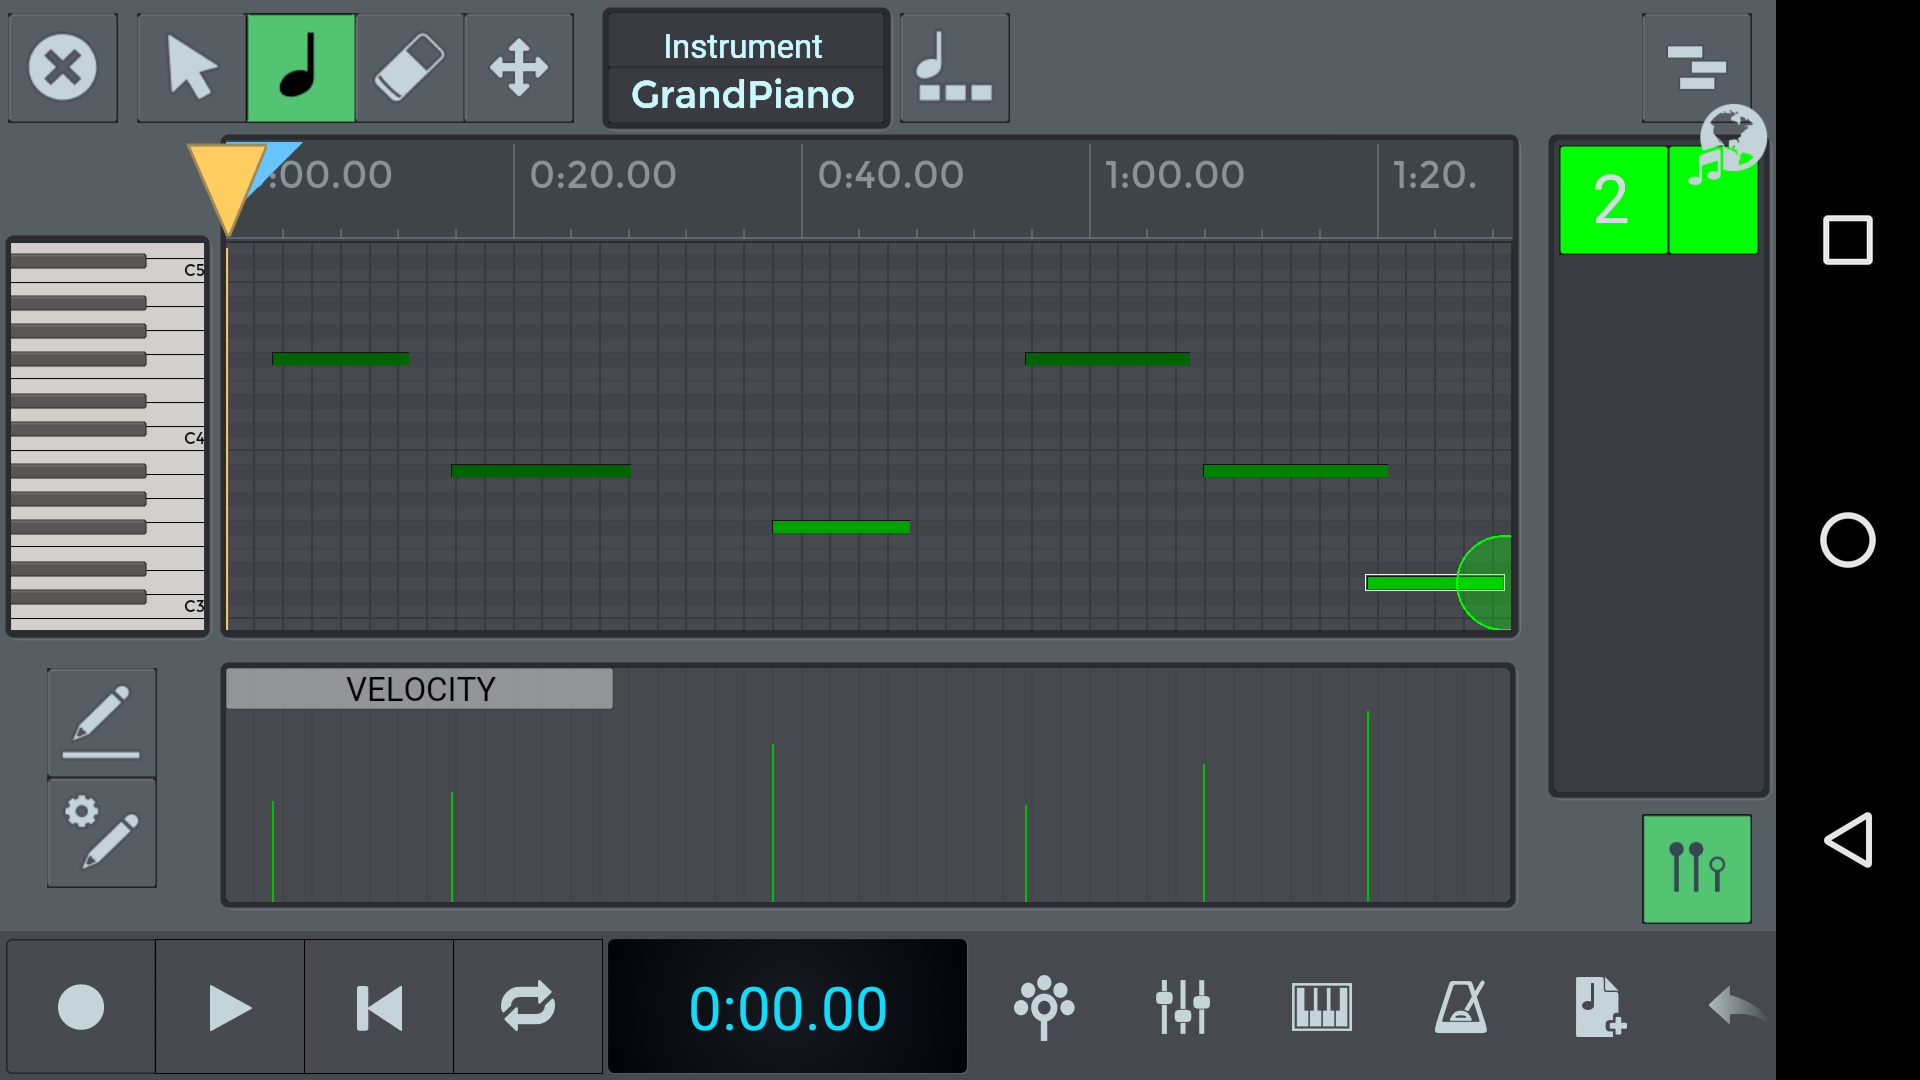
To write MIDI parts just select the “note” icon and start drawing with your finger. If you need to edit the notes in your sequence, you can use the editing widgets to move, delete notes and so on.
A key part of composing MIDI, and in fact useful to make your sounds less mechanical or robotic and pheraps a little more human, is to edit the notes velocities, which represent the intensity with which the notes were pressed.
To edit velocities, you can use the area below the MIDI notes editor and draw the velocity curve you’re looking for.
You can also choose to draw Pitch bend curves or curves for other controller parameters, such as the mod wheel.
If your project has more than one MIDI track, then you’ll see the other tracks in this area of the piano roll. Here you can easily switch to a different track or decide to show and control more tracks in this same piano roll window.
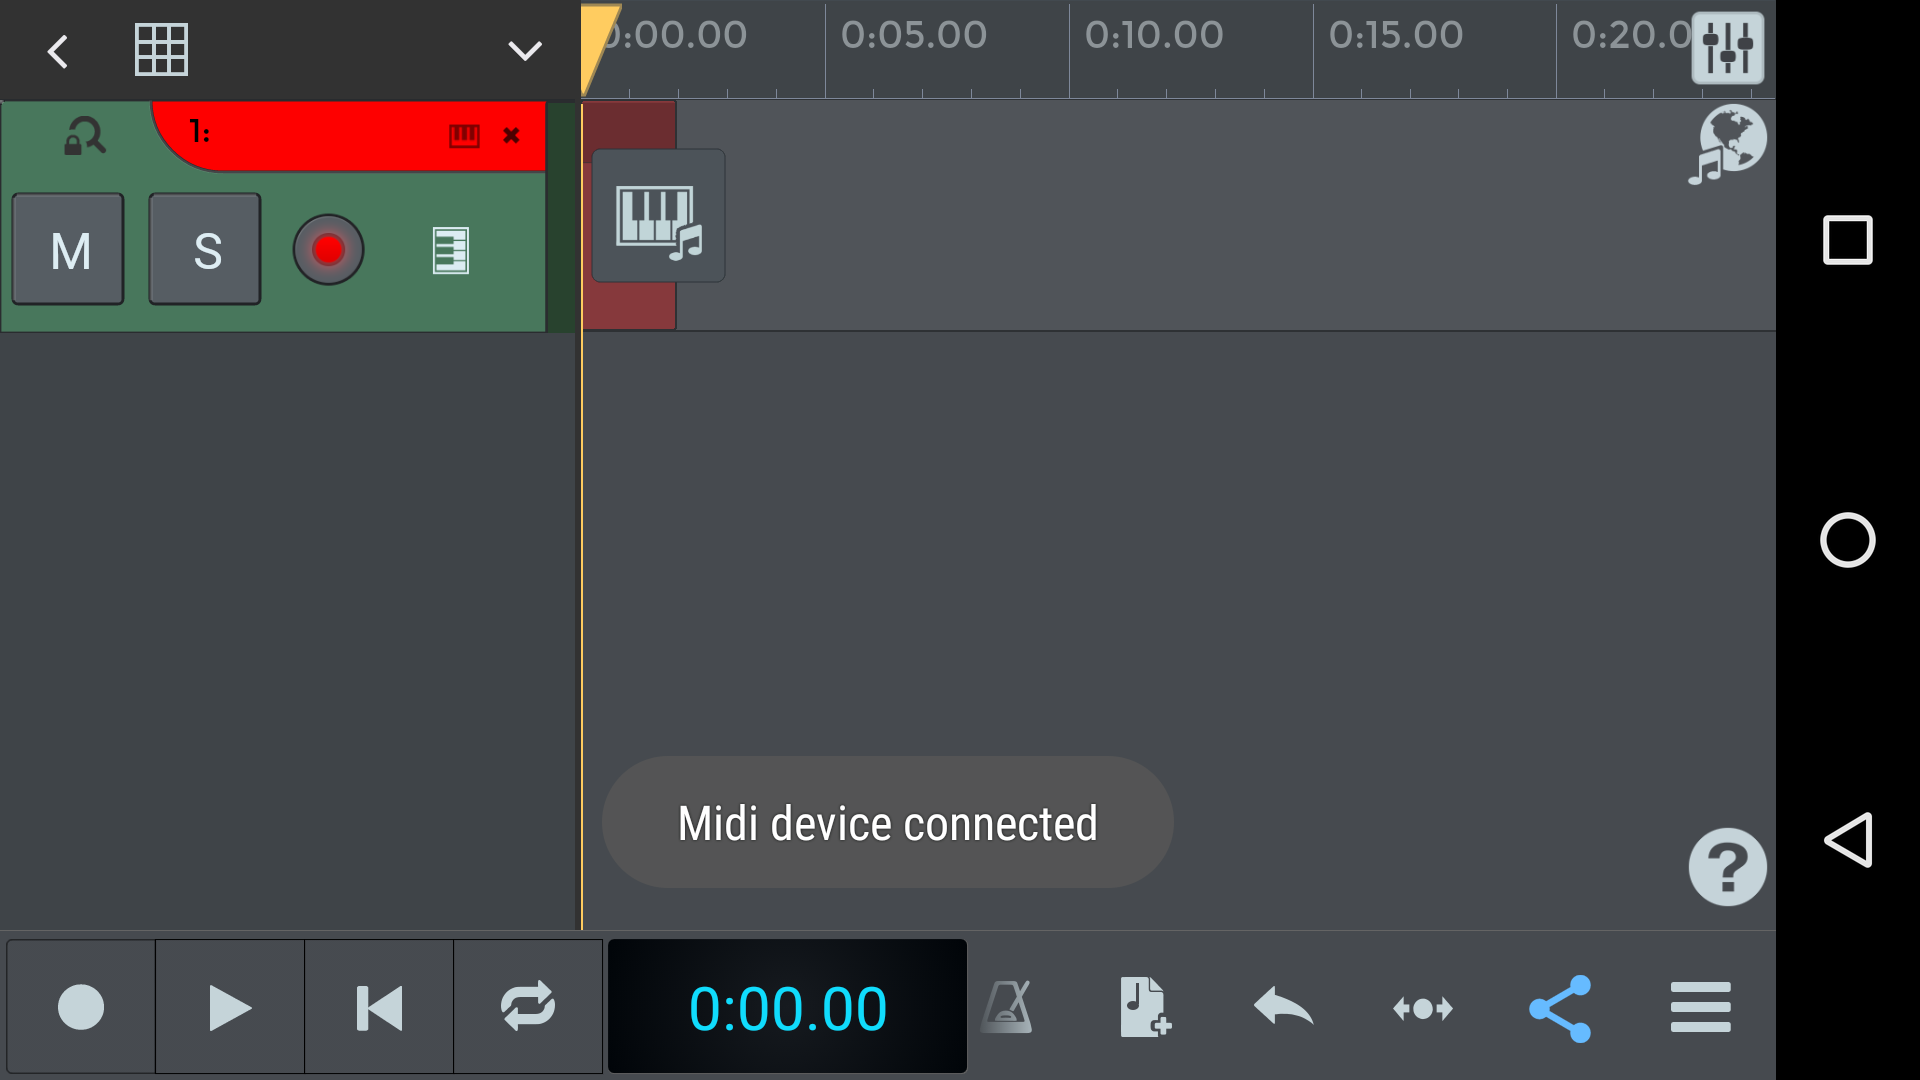
If you prefer the feel of an actual keyboard, you might prefer to play an external MIDI controller.
If you’re using a more common USB connection, all you need to do is connect it to your device and n-Track should automatically recognize it.
At the first opening, n-Track shows the Start your song menu. Here you can choose among different templates that let you start your song quickly and easily.
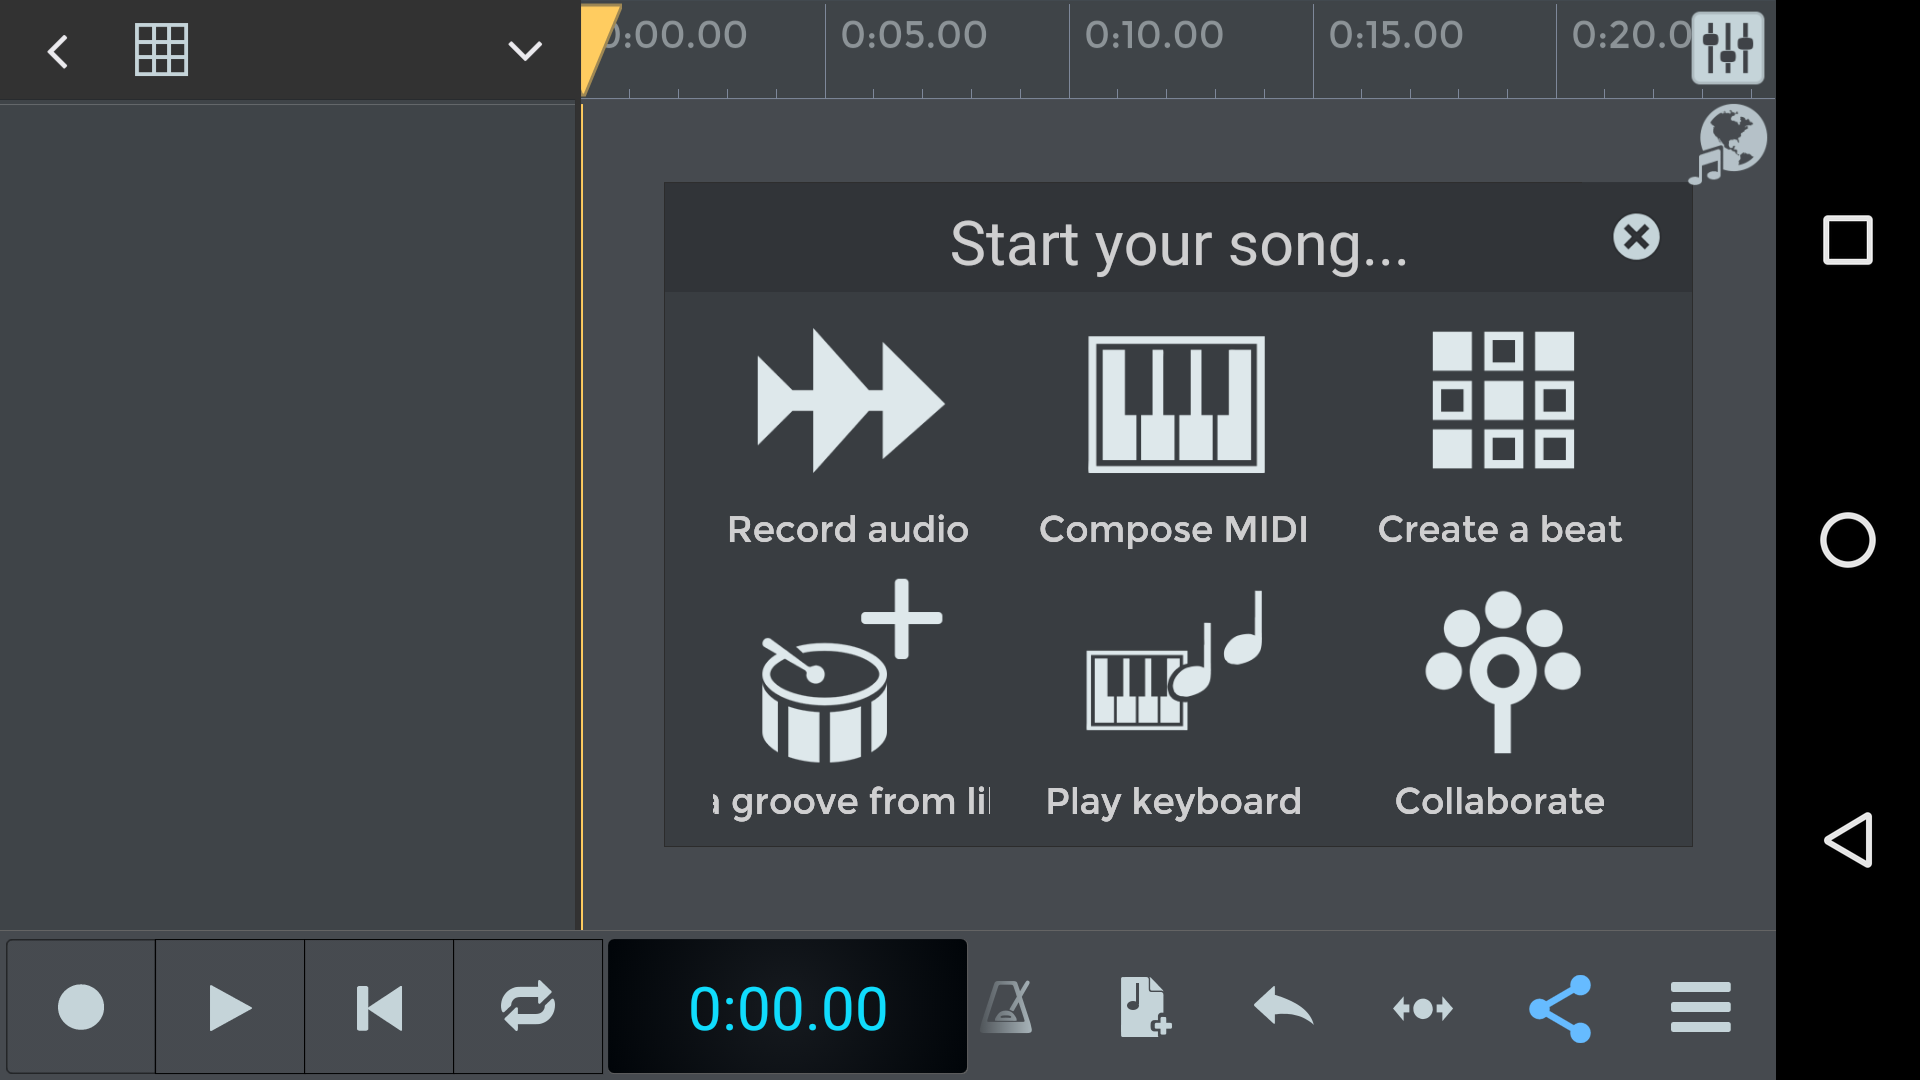
The menu lets you choose between 6 ways of getting started:
To start your song from scratch, without using a template, just close the menu.
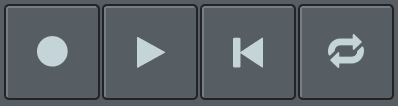
The transport toolbar contains the transport control to navigate the song, play, start recording and using the playback loop function.

The main toolbar is a scrollable area that contains the most important functions of n-Track Studio. This is your control panel. Here you’ll find all you need to compose your songs.


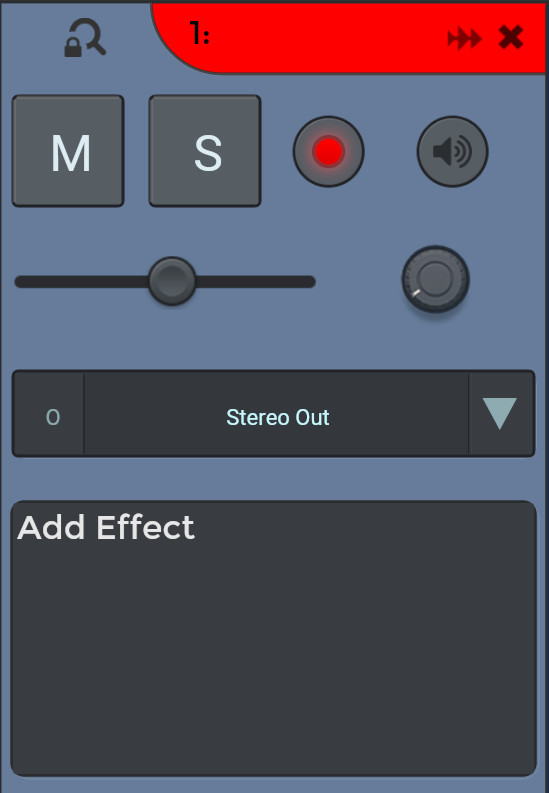
The track bar contains the control commands of a specific track, like mute, solo, arm button, monitor live input button, pan, channel output, and channel insert effect panel.


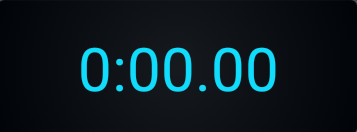
The time status window displays the project’s current time. Tap on it to choose the time display format and switch from 30fps to M:B:T
In n-Track Studio you'll find two ways of accessing editing controls:

You can edit a part via the waveform editing widgets.
To open it, longpress on part's waveform
The grid icon![]() shows or hides the grid. By enabling the grid you'll be able to choose among different grid parameters (Measure, Beat, Eight, Sixteenth, 32nd, 64nd, 128th).
shows or hides the grid. By enabling the grid you'll be able to choose among different grid parameters (Measure, Beat, Eight, Sixteenth, 32nd, 64nd, 128th).
Enable snap to grid: If this option is checked, the selection and the parts offsets (when dragging with your finger) will snap to the nearest grid line.
In some cases, showing or hiding different kinds of tracks could be useful. You can set which track type will be visible or hidden on the timeline by tapping the select tracks to view icon ![]() .
.
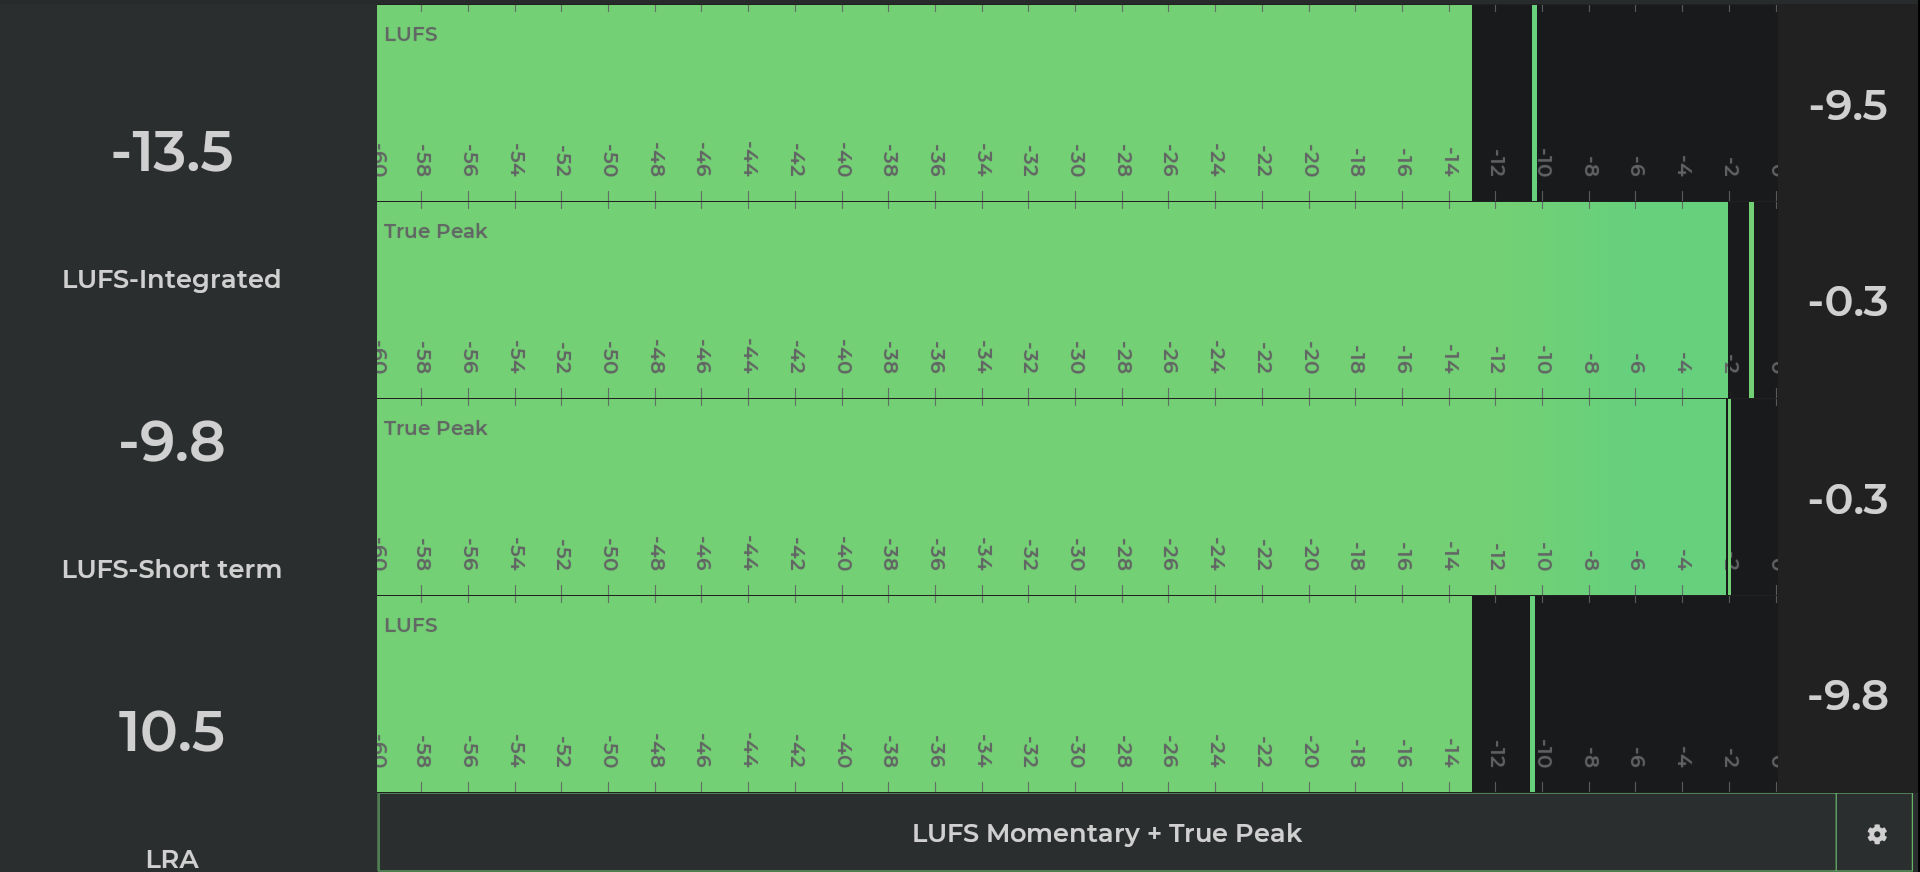
The n-Track level meters allow monitoring the level of the audio signal in various points inside the audio engine. Most meters inside n-Track are pure Peak meters. The n-Track Meter plugin is instead configurable with any of the metering mdoes below.
The level meters can work in a combination of the following metering modes:
We recommend using Peak monitoring during recording and composing phases of music production, then switching to LUFS+True Peak for mixing and mastering.
Below is a list of USB audio devices we tested. On Android comaptibility sometimes also depends on the Android device + USB device combination, so we cannot guarantee that the audio interfaces below will work with 100% of Android devices.
 Supported USB audio devices
Buffering: 4 x 220 samples
Prefers small buffers and high number of buffers. Works correctly at 96000 Hz with 6 buffers of size 480
Use small buffers (e.g. 176 for 44100 Hz) and 6 or as number of buffers
Select Active Inputs = 2
These shortcuts work when using a physical keyboard (either built into the device or connected via USB).
I have problems with garbled or distorted audio
What is the recommended configuration for low latency?
The recorded tracks are almost silent, the recording level is too low
When I record a new track it also ends up containing the audio from the base track(s)
I can't connect or I get errors connecting my USB device to my Android device
My phone is new and has a fast CPU, why I can't add many effects without hearing clicks or distorted audio?
My device has multiple mics, can I record in stereo?
How can I find the song files in my device storage using a third party app?
Why do I get permission erros when trying to save files outside of the app folder?
I've just purchased n-Track Studio Pro and cannot find the songs I've recorded with the non-Pro n-Track Studio app
Can I use the device's built-in mic when I connect my headphones?
I can't play more than 2 keys on the screen keyboard, chords with 3 keys won't play
How can I import my audio files (loops, one shots etc.) into n-Track so that I can use them in my songs?
How can I exit the n-Track app if I don't see the Android home button?
Does the n-Track Studio Pro one-time payment app include all the sound packs?
Please let us know if you have comments or bug-reports about n-Track Studio. We are continually working on improving n-Track and your feedback is greatly appreciated.